Estimated reading time: up to 3 minutes
Import products to Droplo from an XML
You can use two different ways to import your offer into Droplo: manually or by an XML file.
In this manual, we will show you how to use the XML product importer.
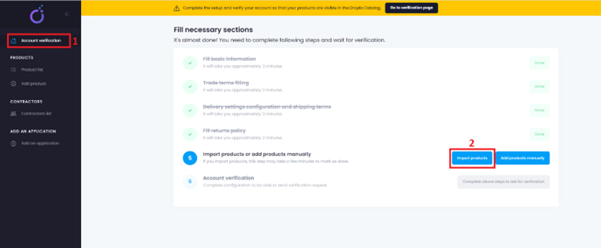
If you’re a new Droplo supplier, you can import the XML offer through the fifth step on the verification page (1). Just use the “Import products” button (2).
A new tab will appear on the left menu called “XML importer” (3). Click on it to access the application.
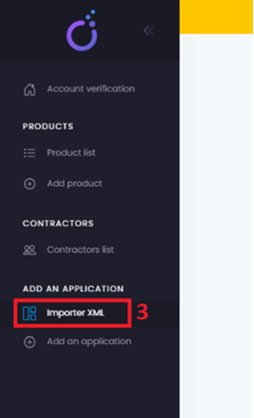
It’s also possible to activate the importer through “Add an application” tab (1). Open it and click on “Connect” button next to the XML importer application (2).

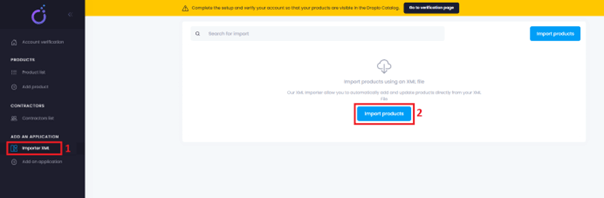
A new tab called XML importer will be then displayed in the left menu (1). Now you can start importing your offer file. Click on “Import products” button (2).
You will be transferred to the first step of the import configuration page:
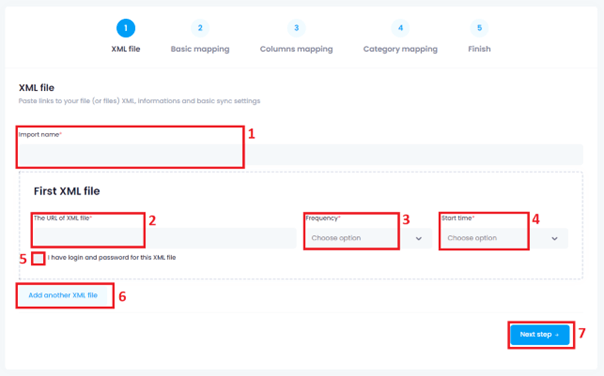
Here, you need to name your import (1), paste the URL address (2), choose the frequency and time for the offer synchronisation (3/4).
Some offerings may be blocked by login and password. If the supplier secures the offer, you can specify this by checking the field concerning this issue (5). You will then be asked for the login and password for the offer file.
If you want to add another offer right away, you can do it using the “Add another XML file” button (6).
When you finish the first part of the import configuration, go to the next step (7).
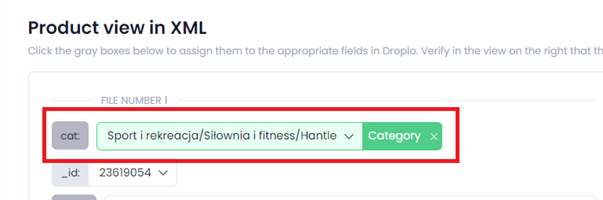
Now you will see another part of the configuration called Basic mapping. It contains two main fields from the XML file: root and ID. These fields are updated automatically, but you can change them if the values were wrongly attached.
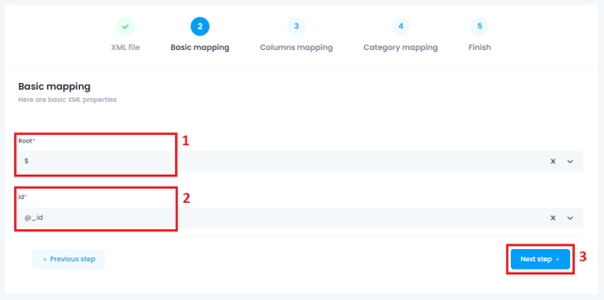
If the values are correct, then you can go to the next step (3) – Columns mapping.
In this part, on the left side, you need to link the product attributes from the file with the Droplo attribute types. The fields that need to be connected are marked by a dark grey colour.
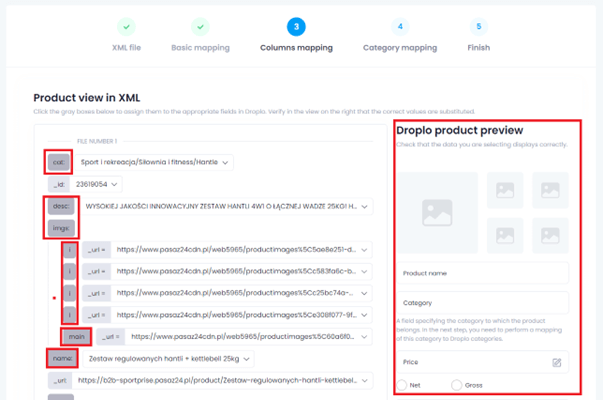
On the right side you can see how the data will be displayed in Droplo for each of the products (product preview) and set other important information such as choosing if the price in the file is in net or gross value.
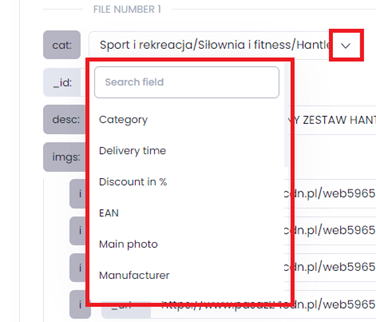
Use the drop-down lists to link the appropriate data between your XML file and Droplo.
When the match is done, the following row should get highlighted in green colour.
When you match all the needed product characteristics, go to the right side.
As you can see in the notification below the discount field (1), Droplo displays wholesale prices. Therefore, if the prices from the XML file are retail prices, then you need to reduce the relevant tax percentage by placing a discount for the imported data, to make the prices shown as wholesale.
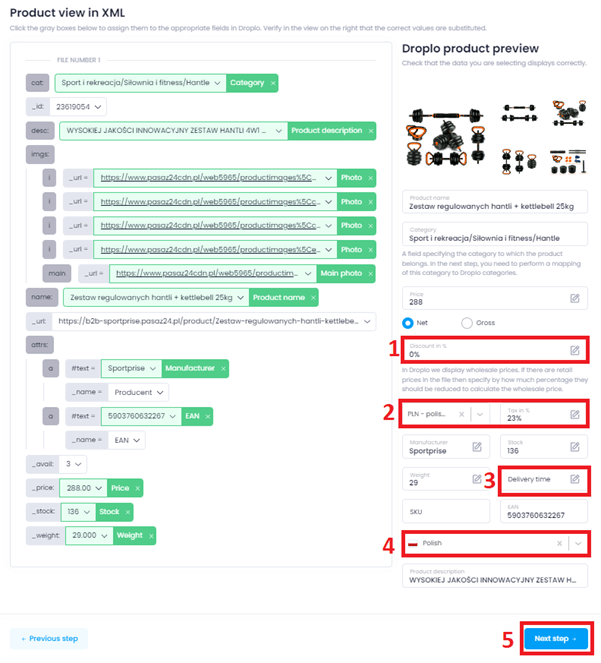
There are 4 other fields that should be set before going further:
- Currency / tax (2) – what is currency and tax value for this XML file?
- Delivery time (3) – how long it will take to deliver the products
- language of the imported data (4) – what is the original language of the descriptions?
When you finish all required actions on this page, go to the next step (5) – Category mapping.
Here you will be asked to link the categories from your file with Droplo categories. You can click on drop down lists to assign different categories for every row, or mark all categories in bulk. Then a new button will appear called “Assign to one category”.
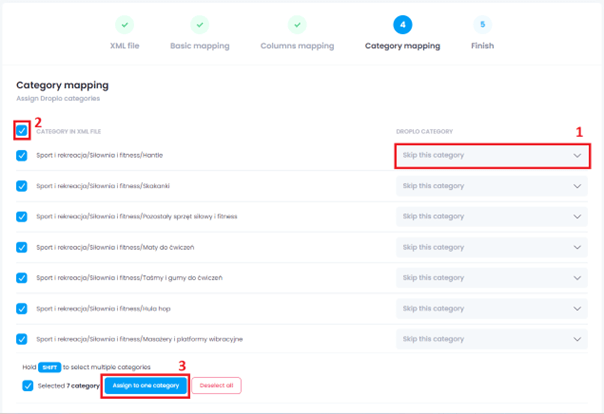
Both options will show you the categories’ selection card. Choose or search the most matching options for the categories imported from XML file.

When this part is done, go to the last step called “Finish”. If you reach this part of configuration, you should see a confirmation that the process was successfully finished.
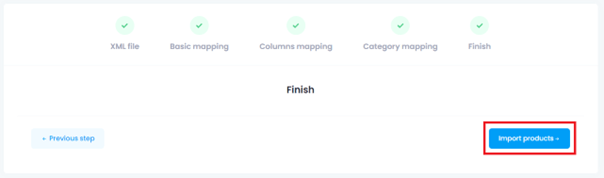
Use the button “Import products” to finalise this part.
You will be then transferred to the XML importer tab, where the offer should be now listed.
Also, it’s possible to check if all detected products were successfully imported from the file (1/2), and what is the status of the import. If you want to edit or delete the existing import, use the “Actions” option to do so.

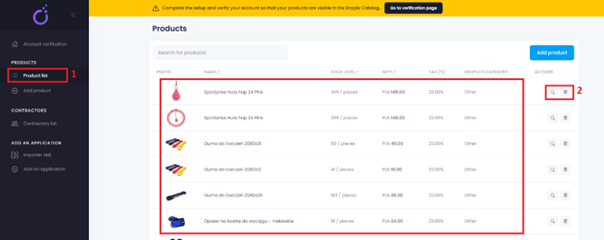
Your products should be now displayed in the “Product list” tab (1). It’s possible to preview or delete each of the imported products (2).