Estimated reading time: up to 3 minutes
Want to connect your Shopify store with Droplo? You’re in the right place. Follow this guide to successfully integrate Droplo and our supplier database into your sales channel.
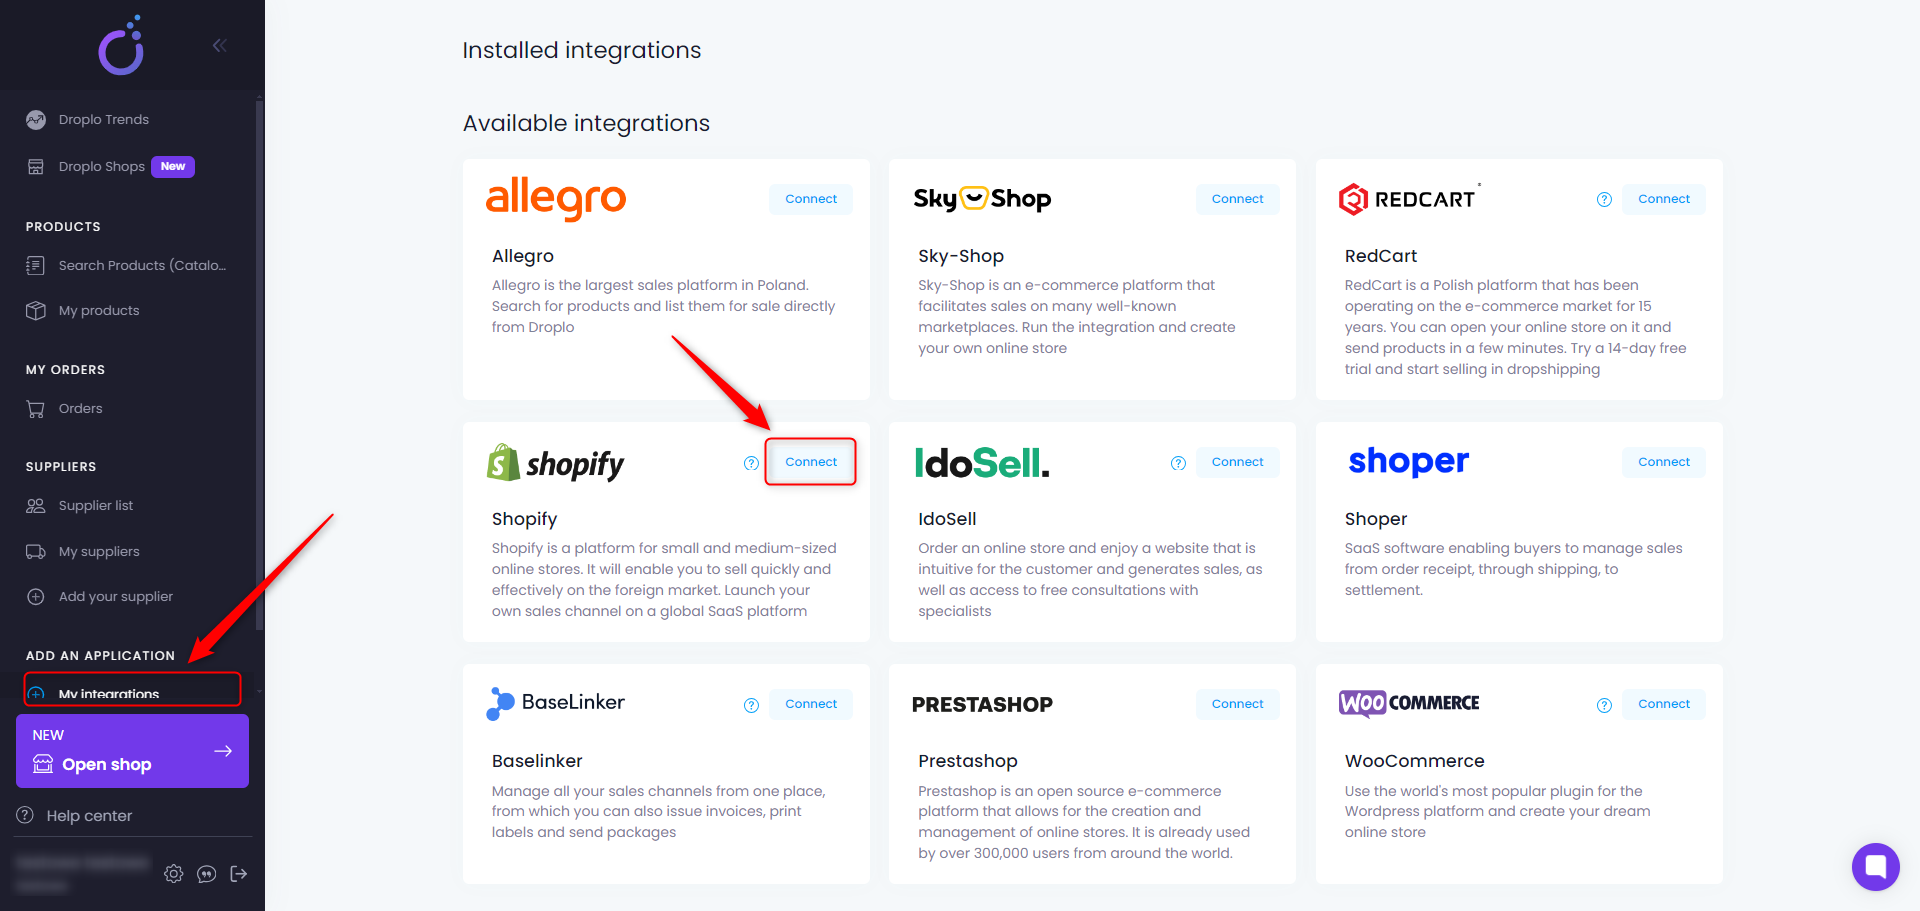
Go to the My Integrations tab and click Connect under the Shopify tab:
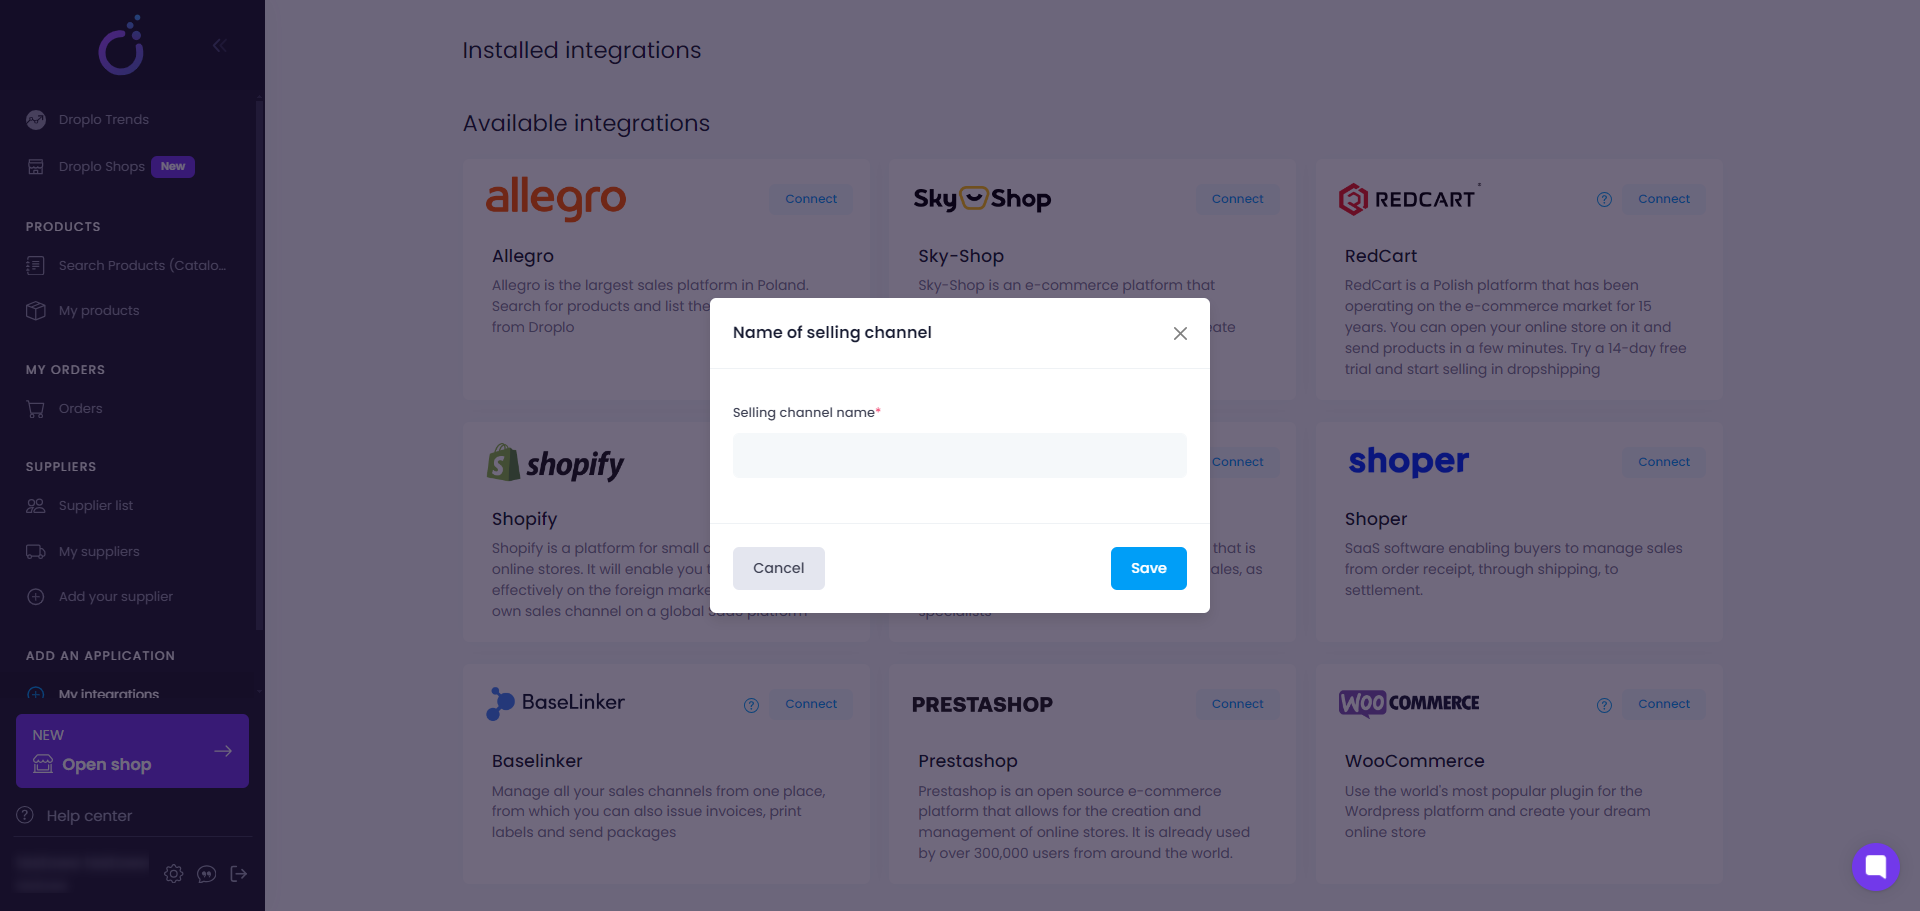
A new window will appear asking you to enter the name of the integration. From now on, the new integration will be named in Droplo according to your wish.
Type thename in the empty field and click Save.
A connection setup tab should appear. In order to pass this step, you must first retrieve authorization data from your Shopify admin panel.
- Your store’s subdomain address (e.g. https://31edab.myshopify.com)
- Shopify Token
- API Secret Key
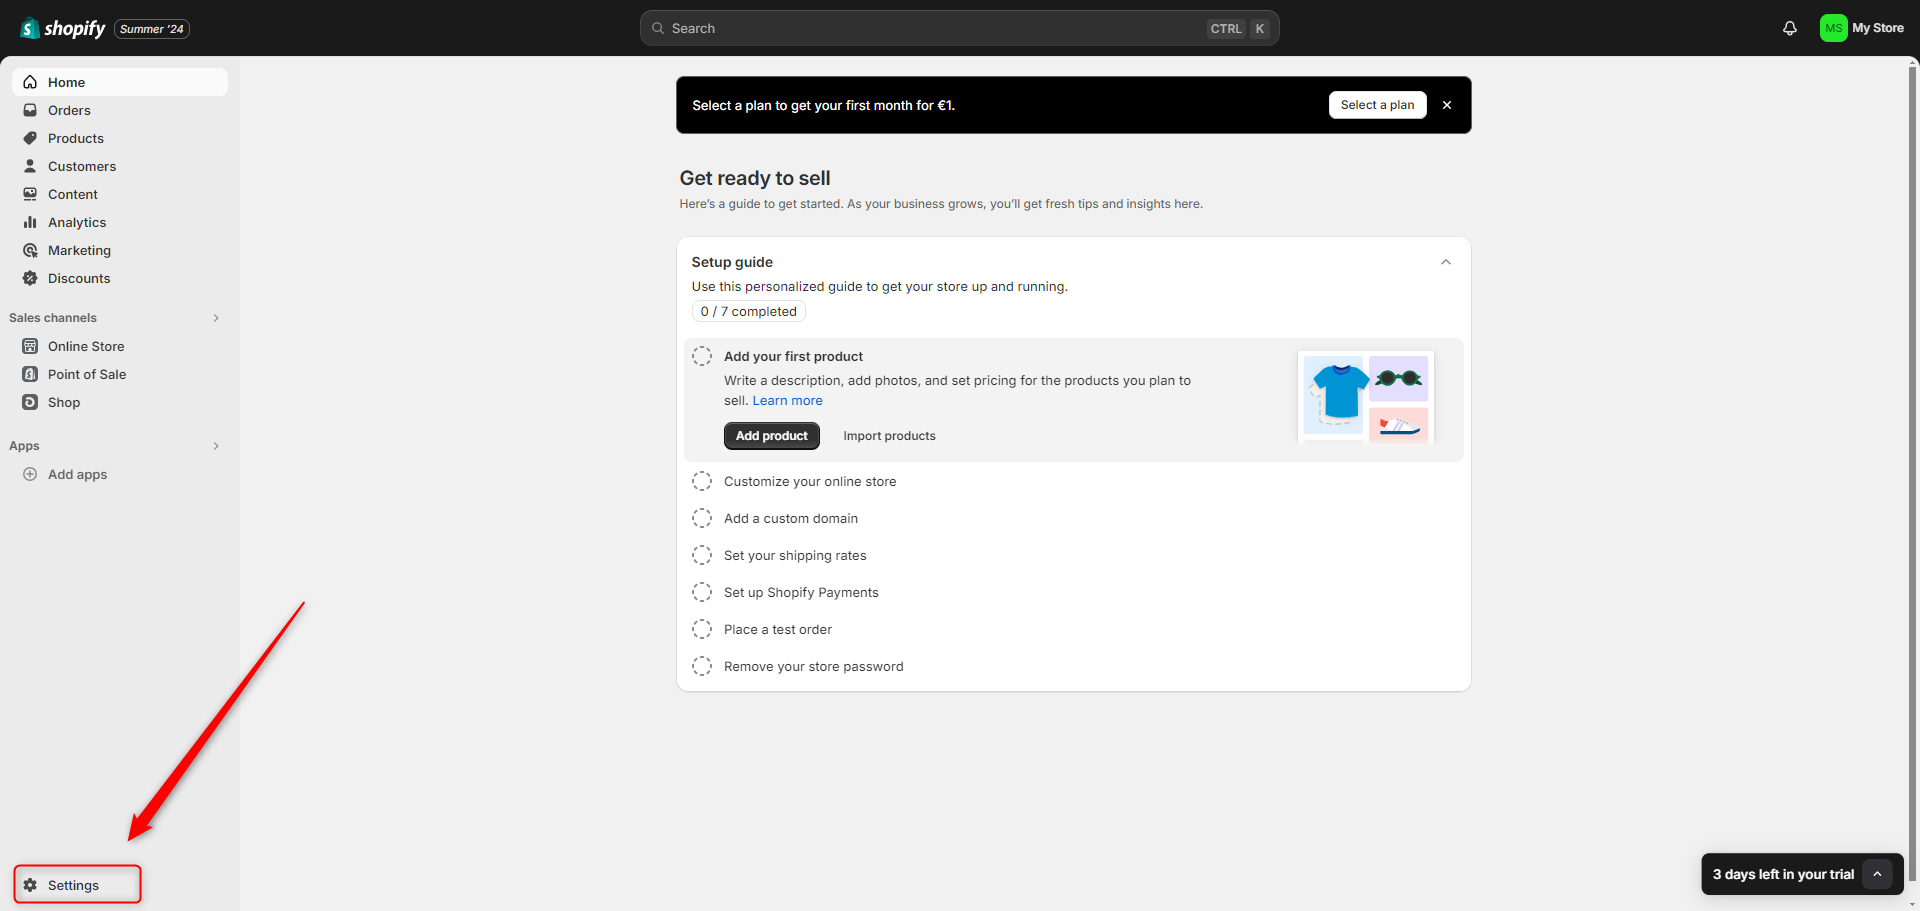
To obtain authorization data, go to your Shopify account and then into Settings.
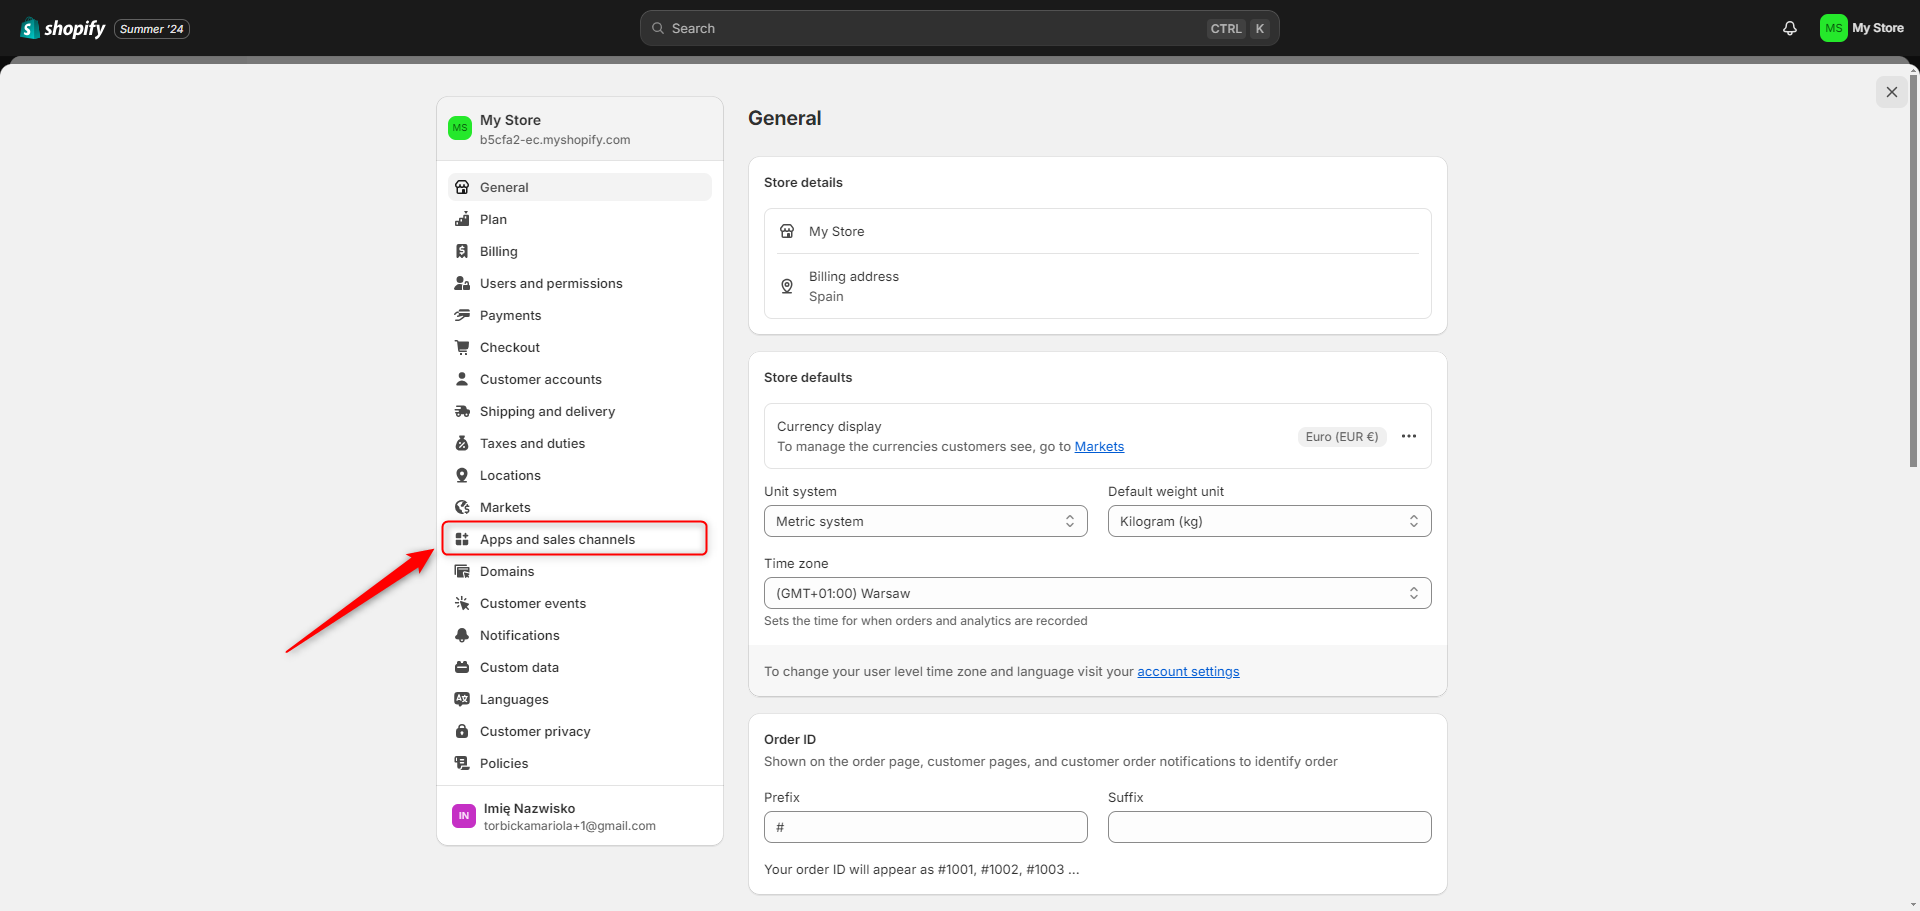
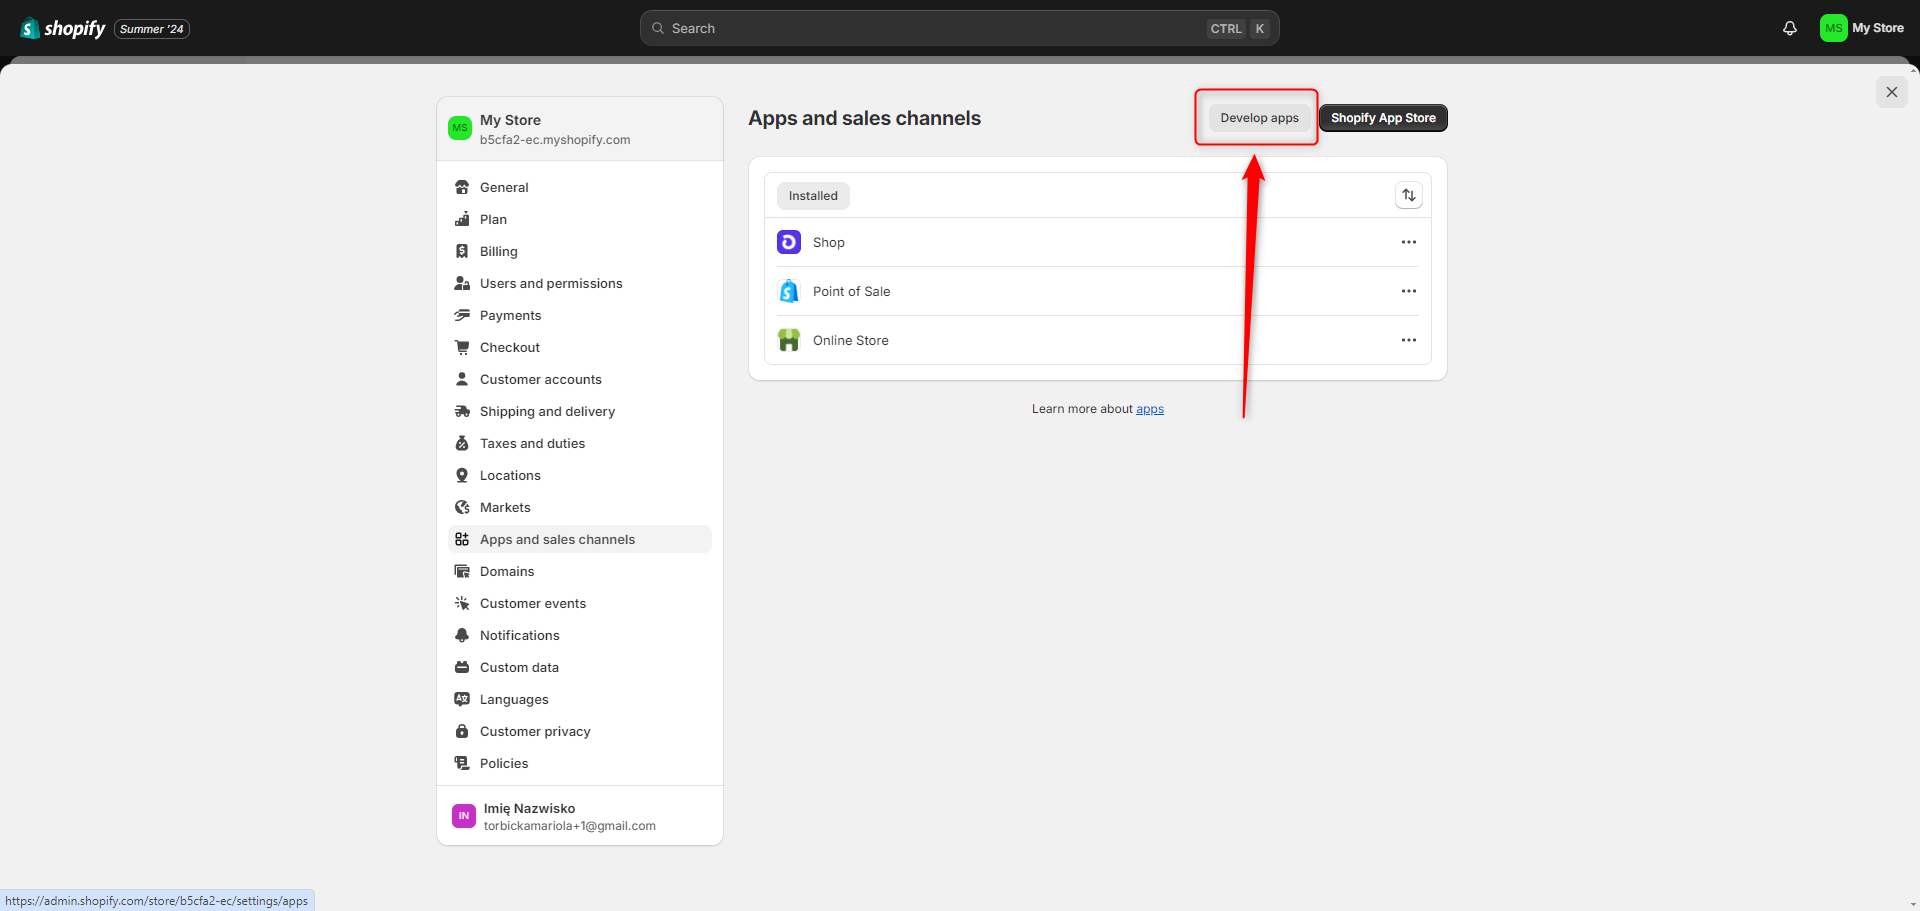
Find the Apps and Sales Channels category and open it:
In the new window, click Develop Apps.
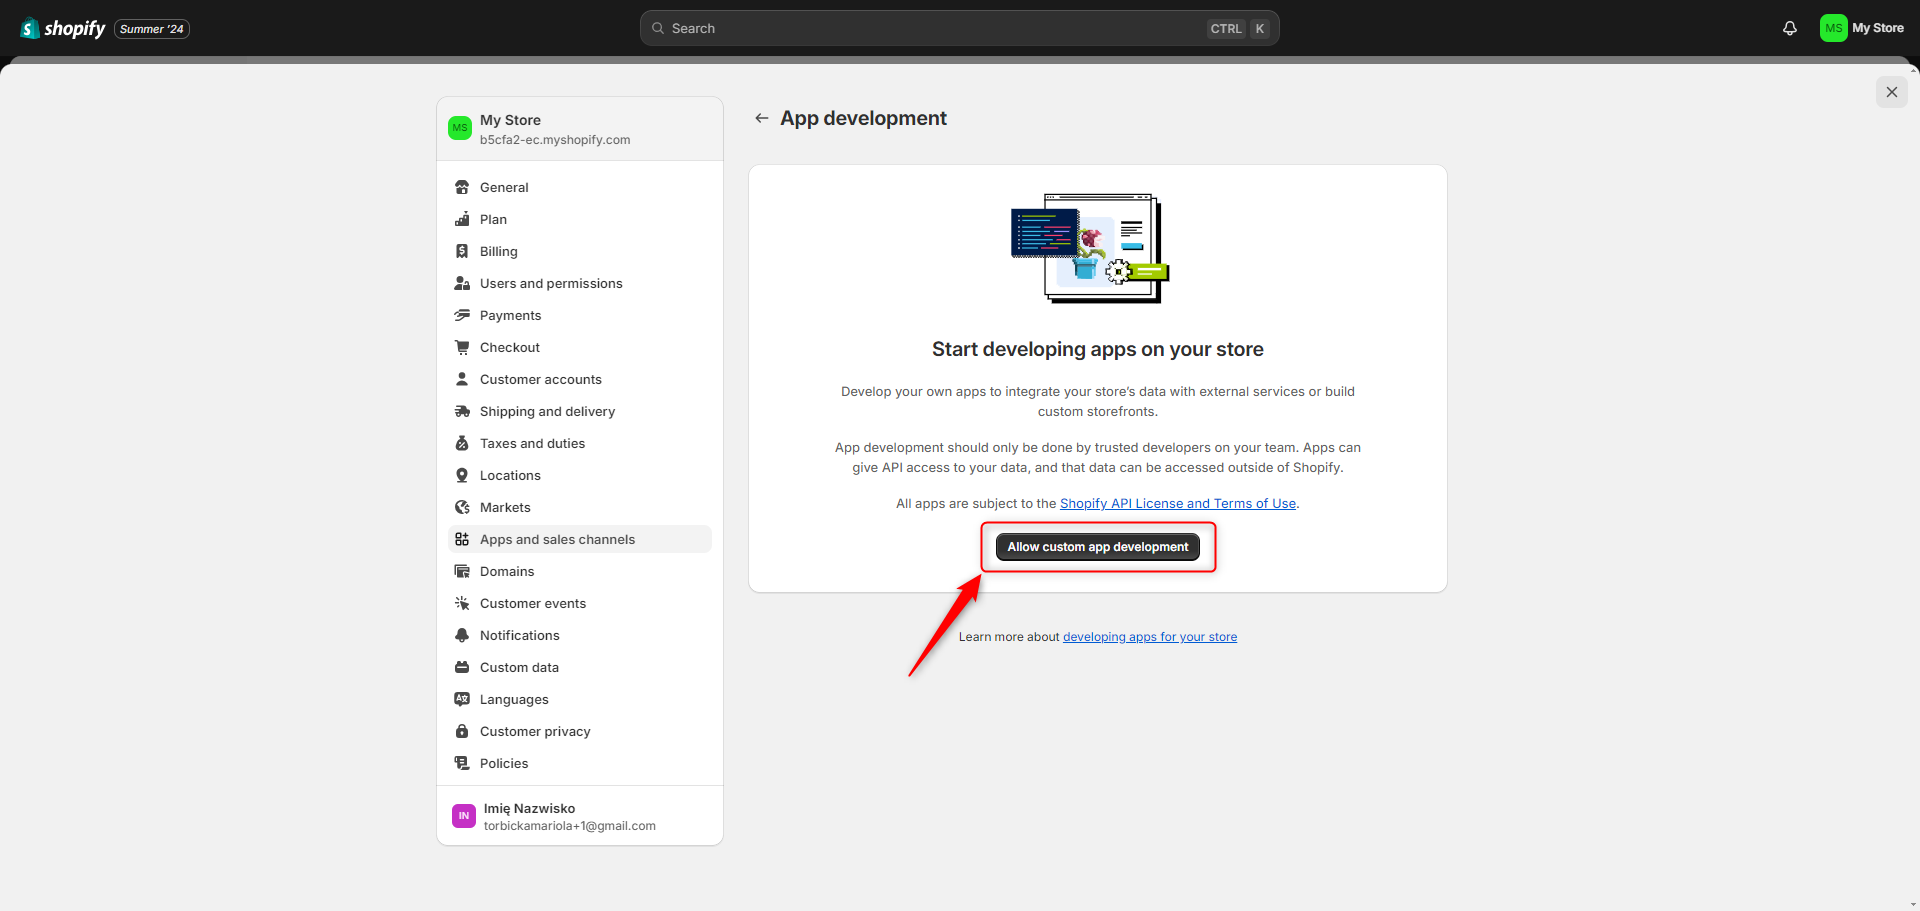
Allow custom app development:
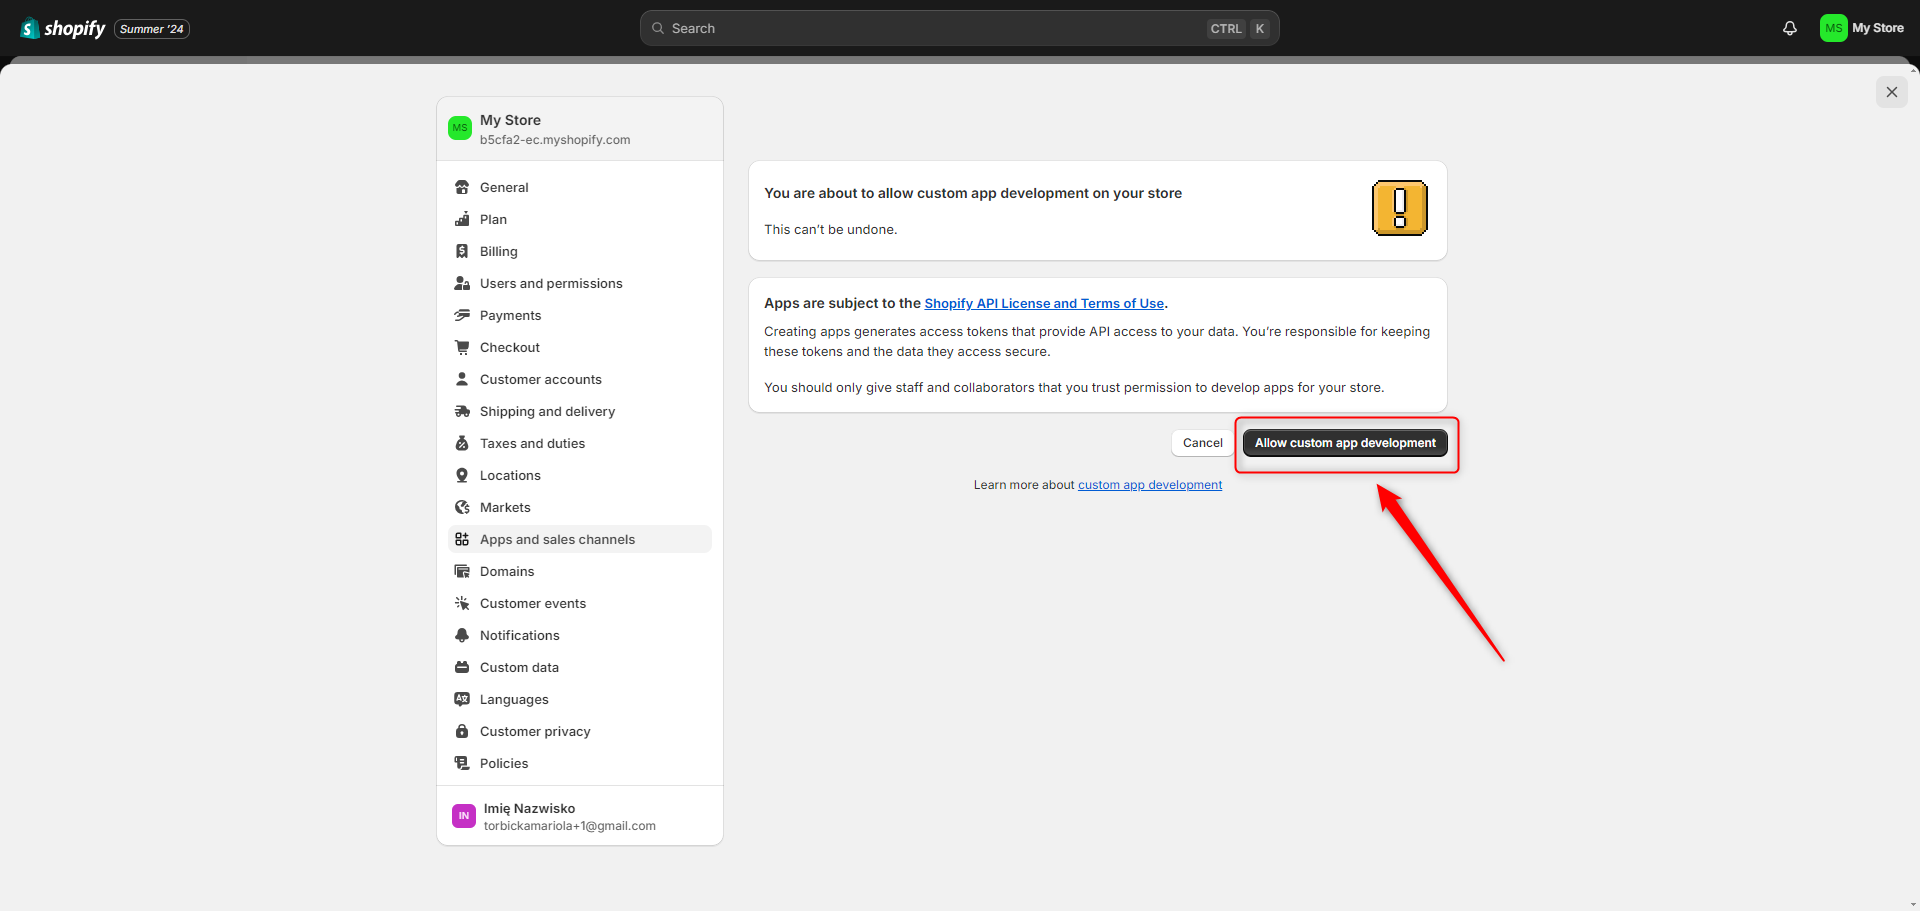
Then click on the Create an app button:
Select the name of the application (e.g. Droplo) and choose your email address from the list. Then click the Create app button.
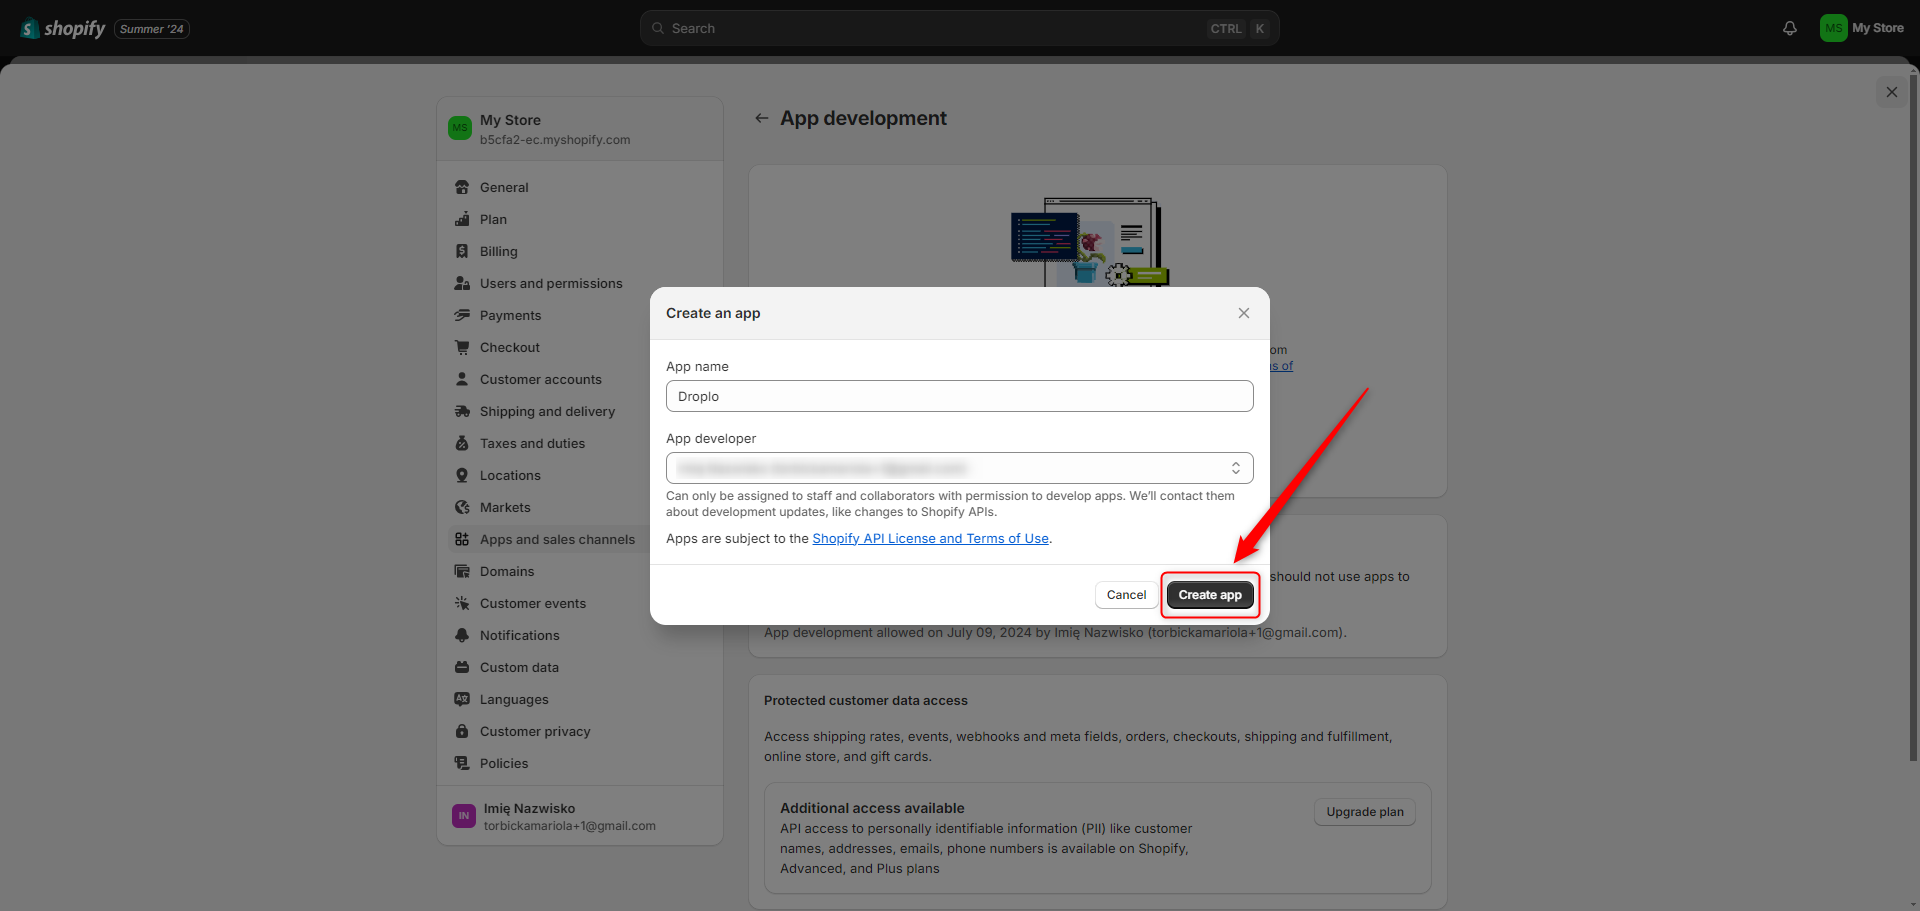
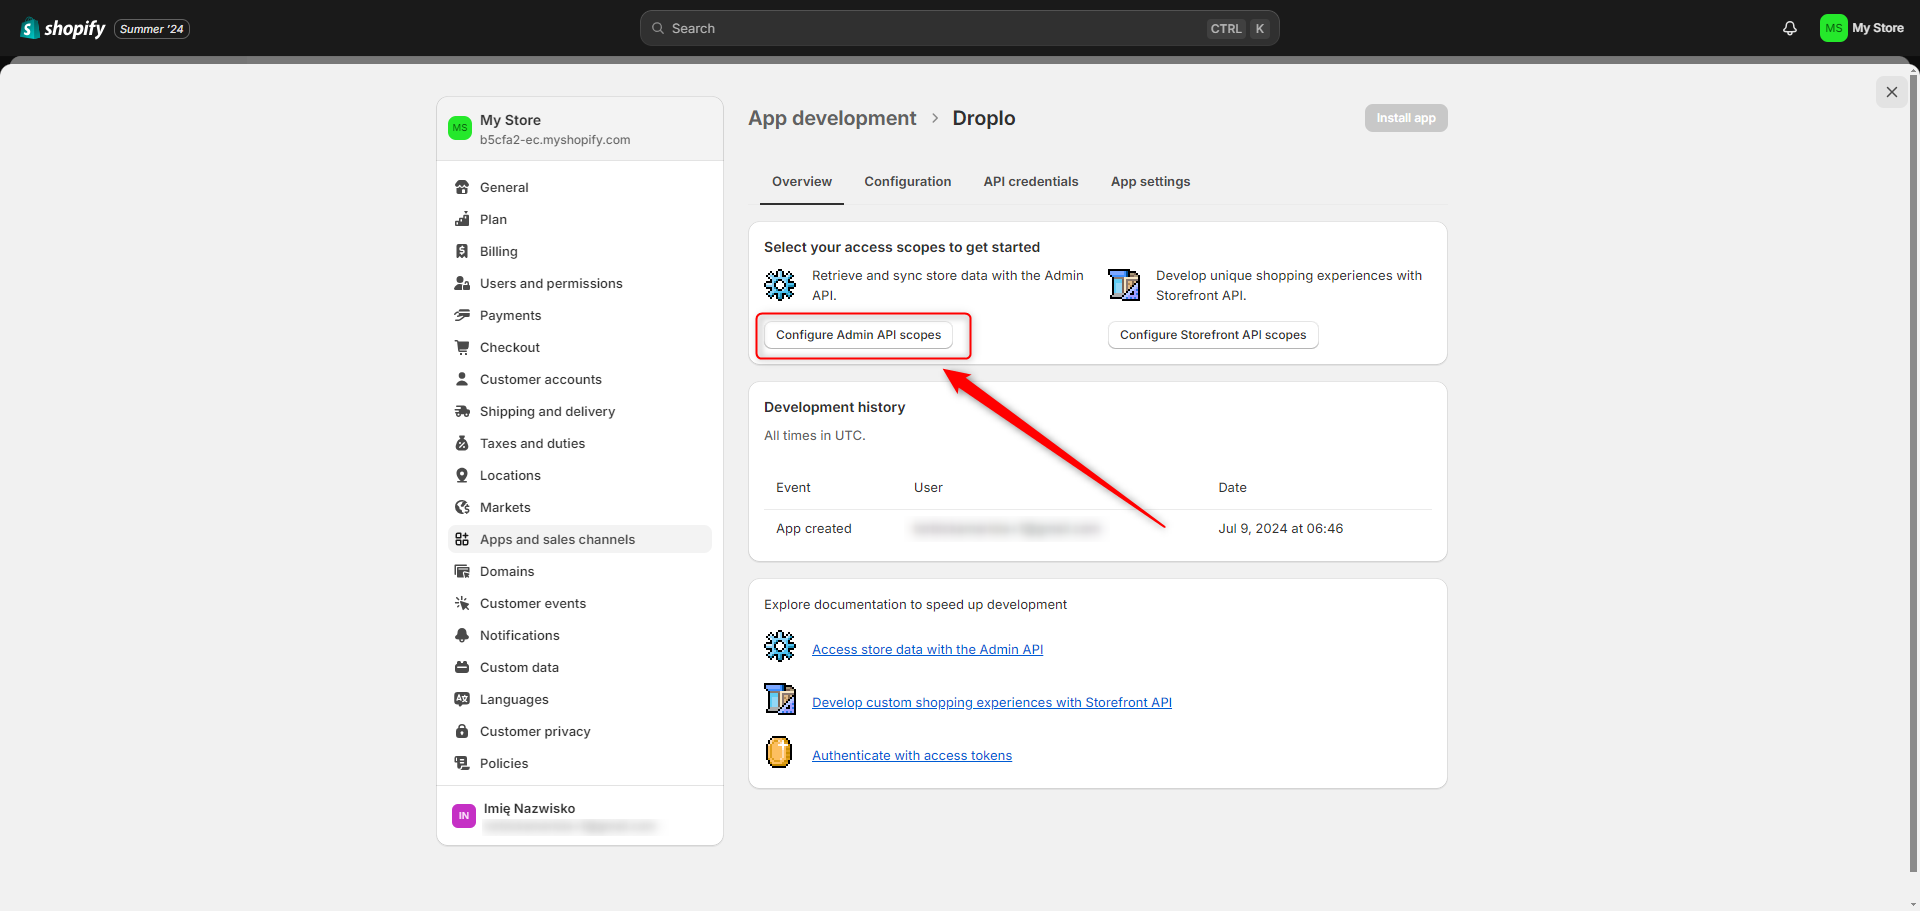
You will be taken to the configuration page. Here you can acquire authorization data, which you will post to Droplo.
First, go to the panel: Configure Admin API scopes.
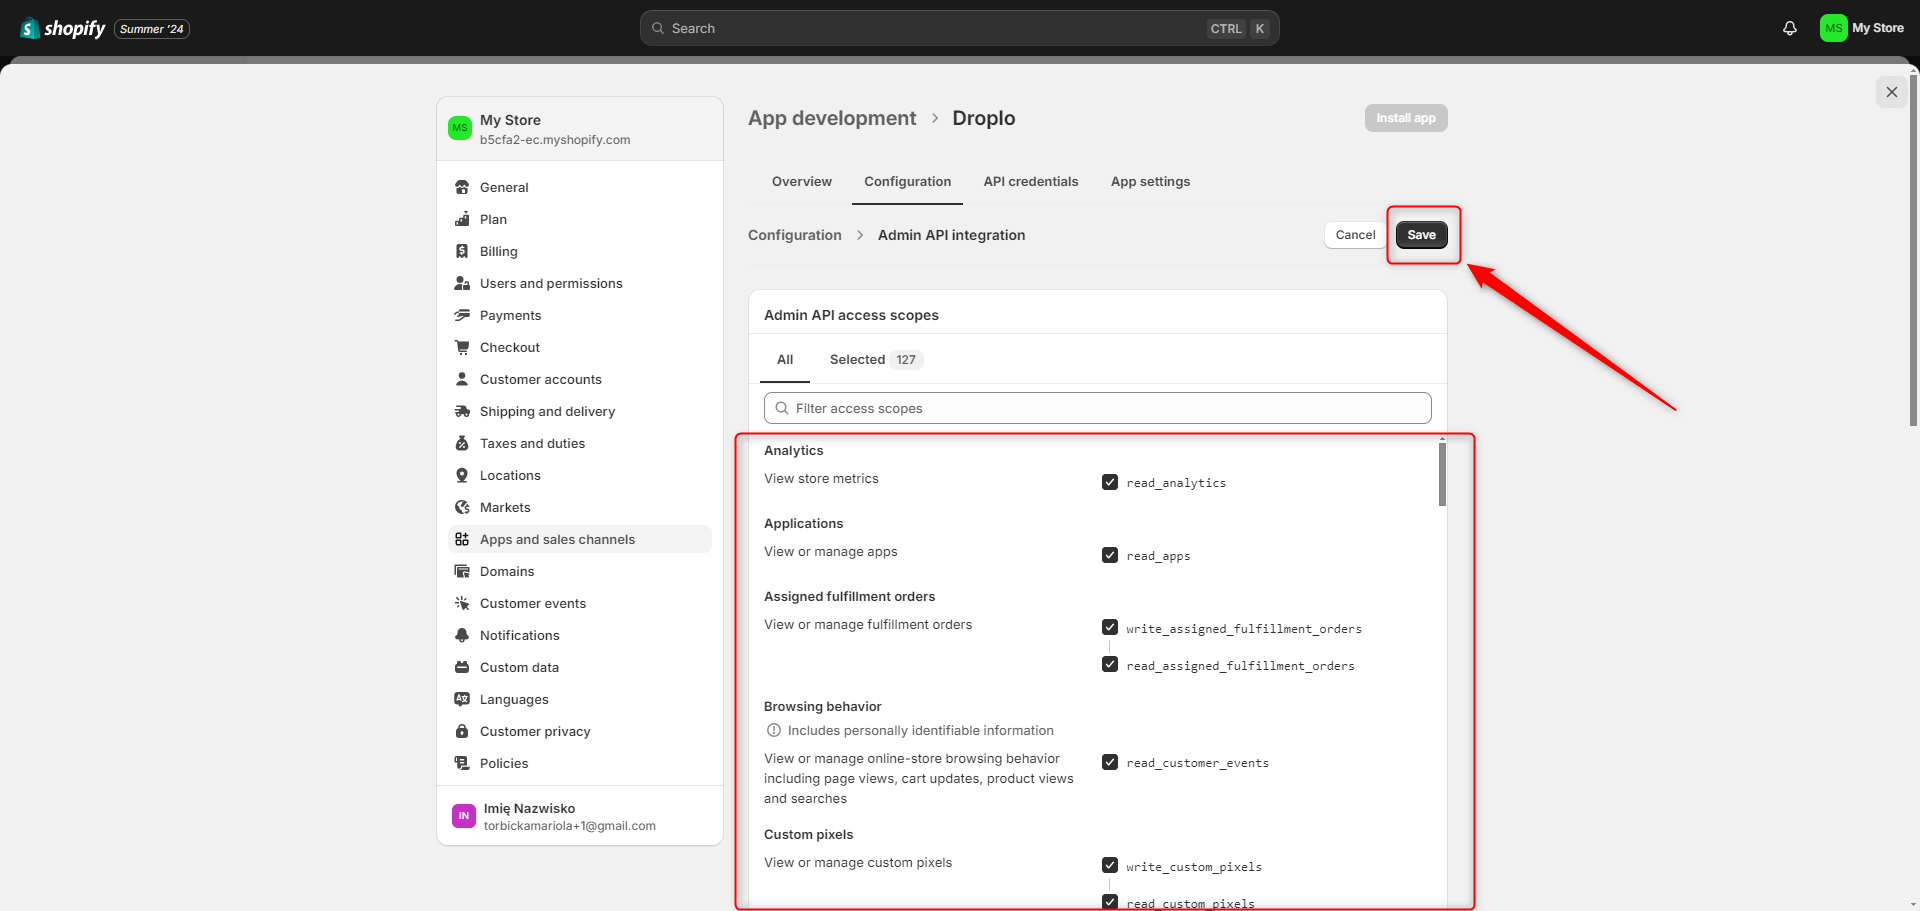
In the configuration tab that should now appear, select ALL AVAILABLE scopes. Then click the Save button. You will be notified that the configuration has been successfully saved.
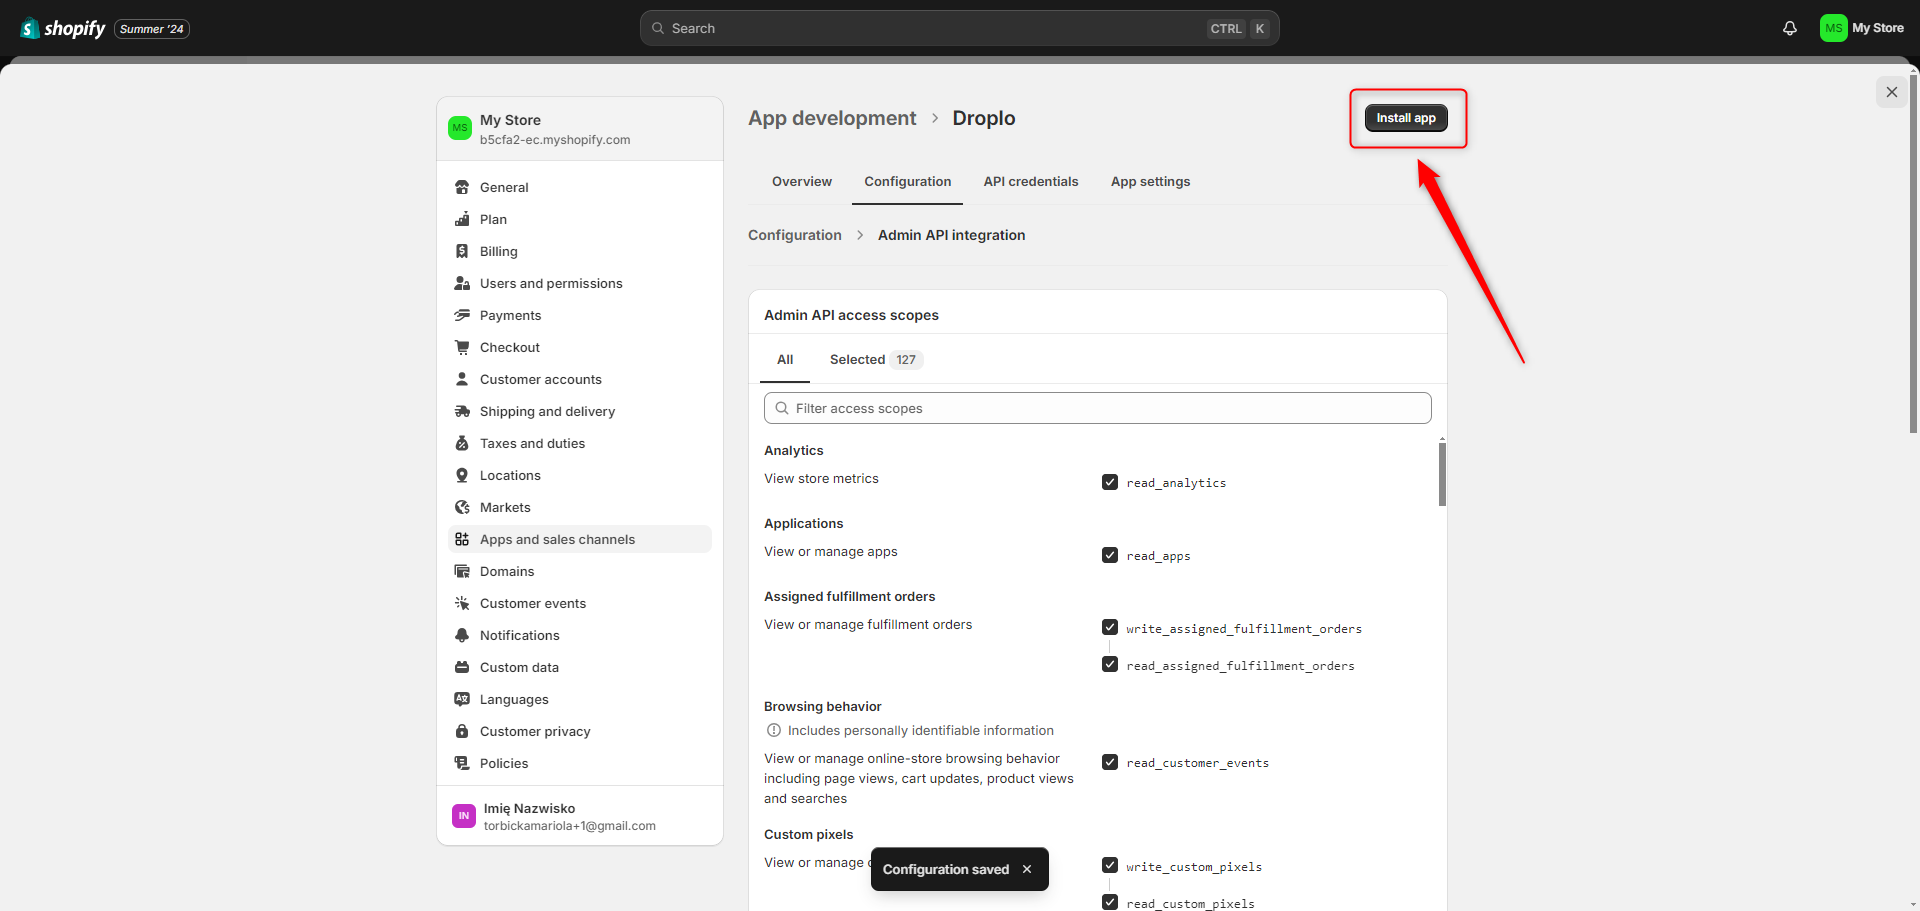
In the upper right corner you will see another button called Install app. Use it.
In a new window, you will be informed about the scopes. By proceeding further, you will also accept the Shopify API License and Terms of Use.

Click the Install button.
You will then be taken to the API credentials tab. Copy and save your unique Admin API access token, as you are only able to do this once.
You can also find the API secret key below.
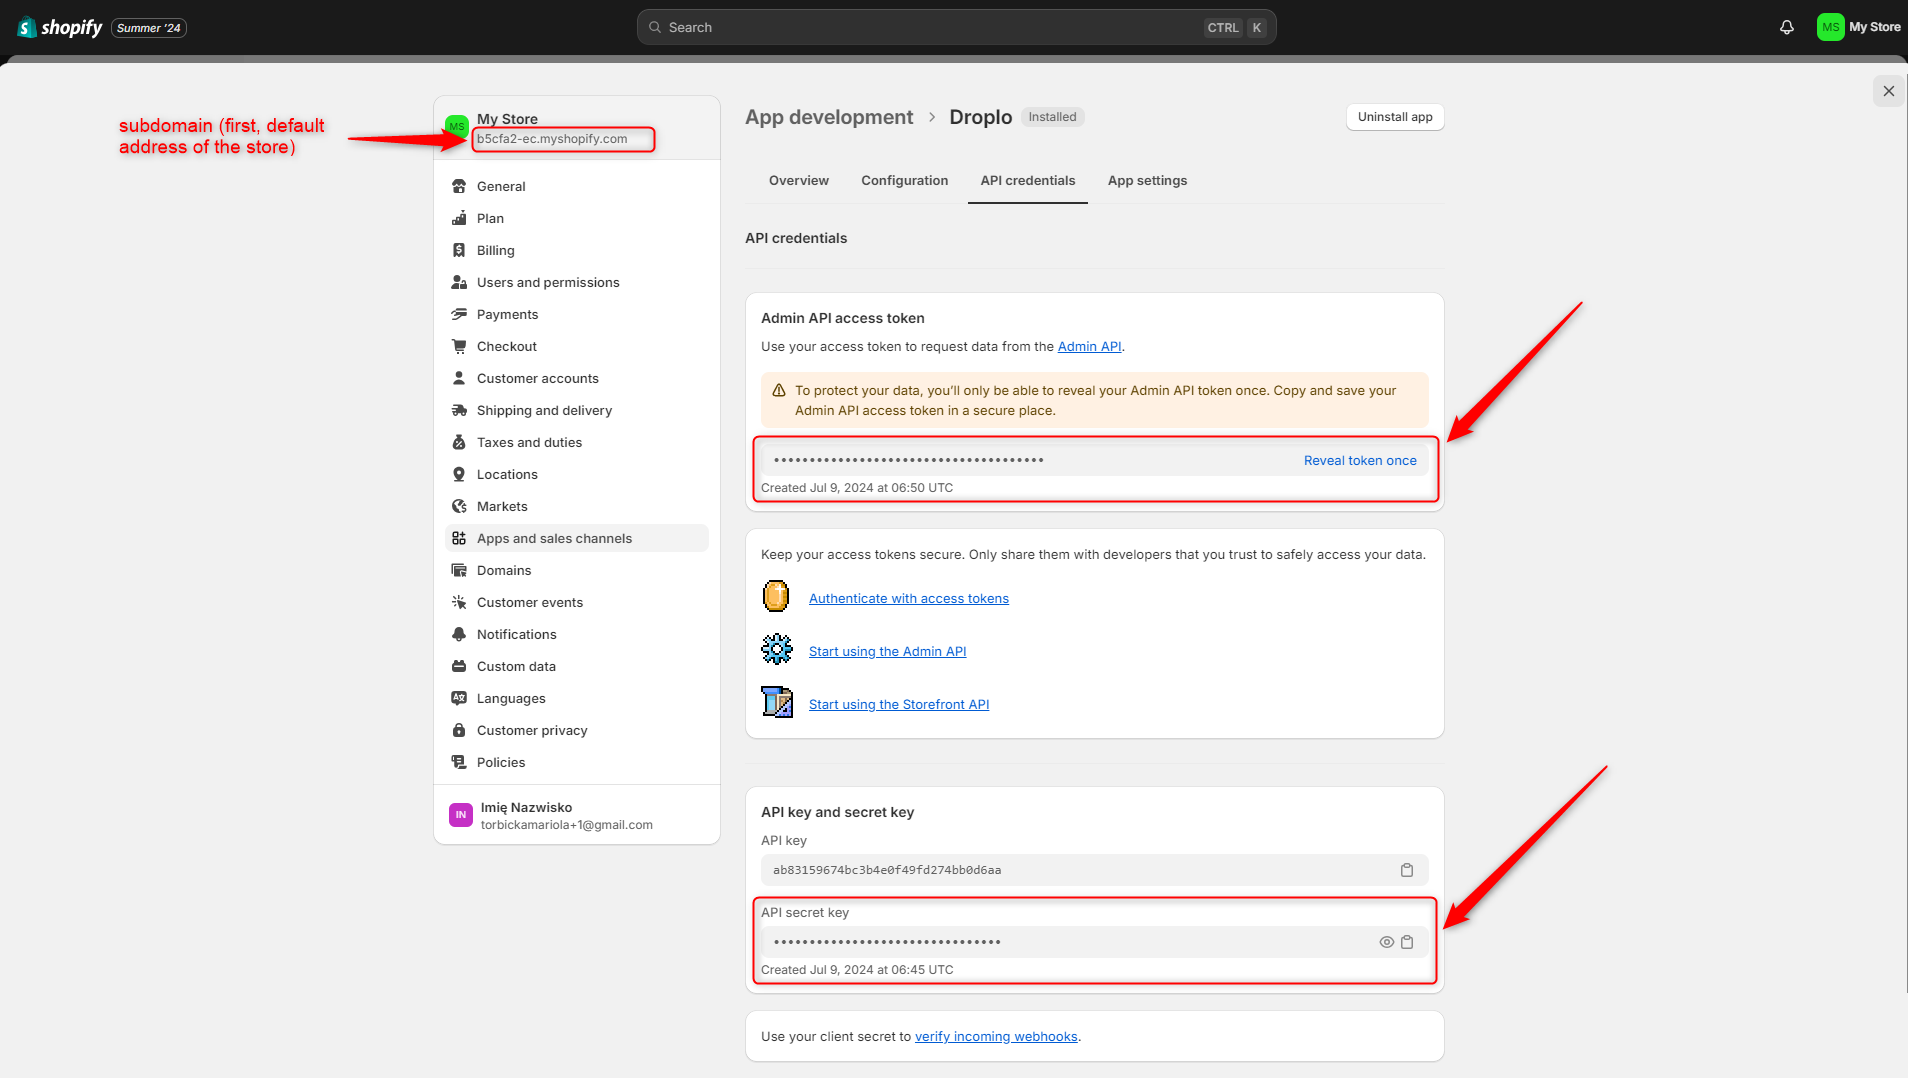
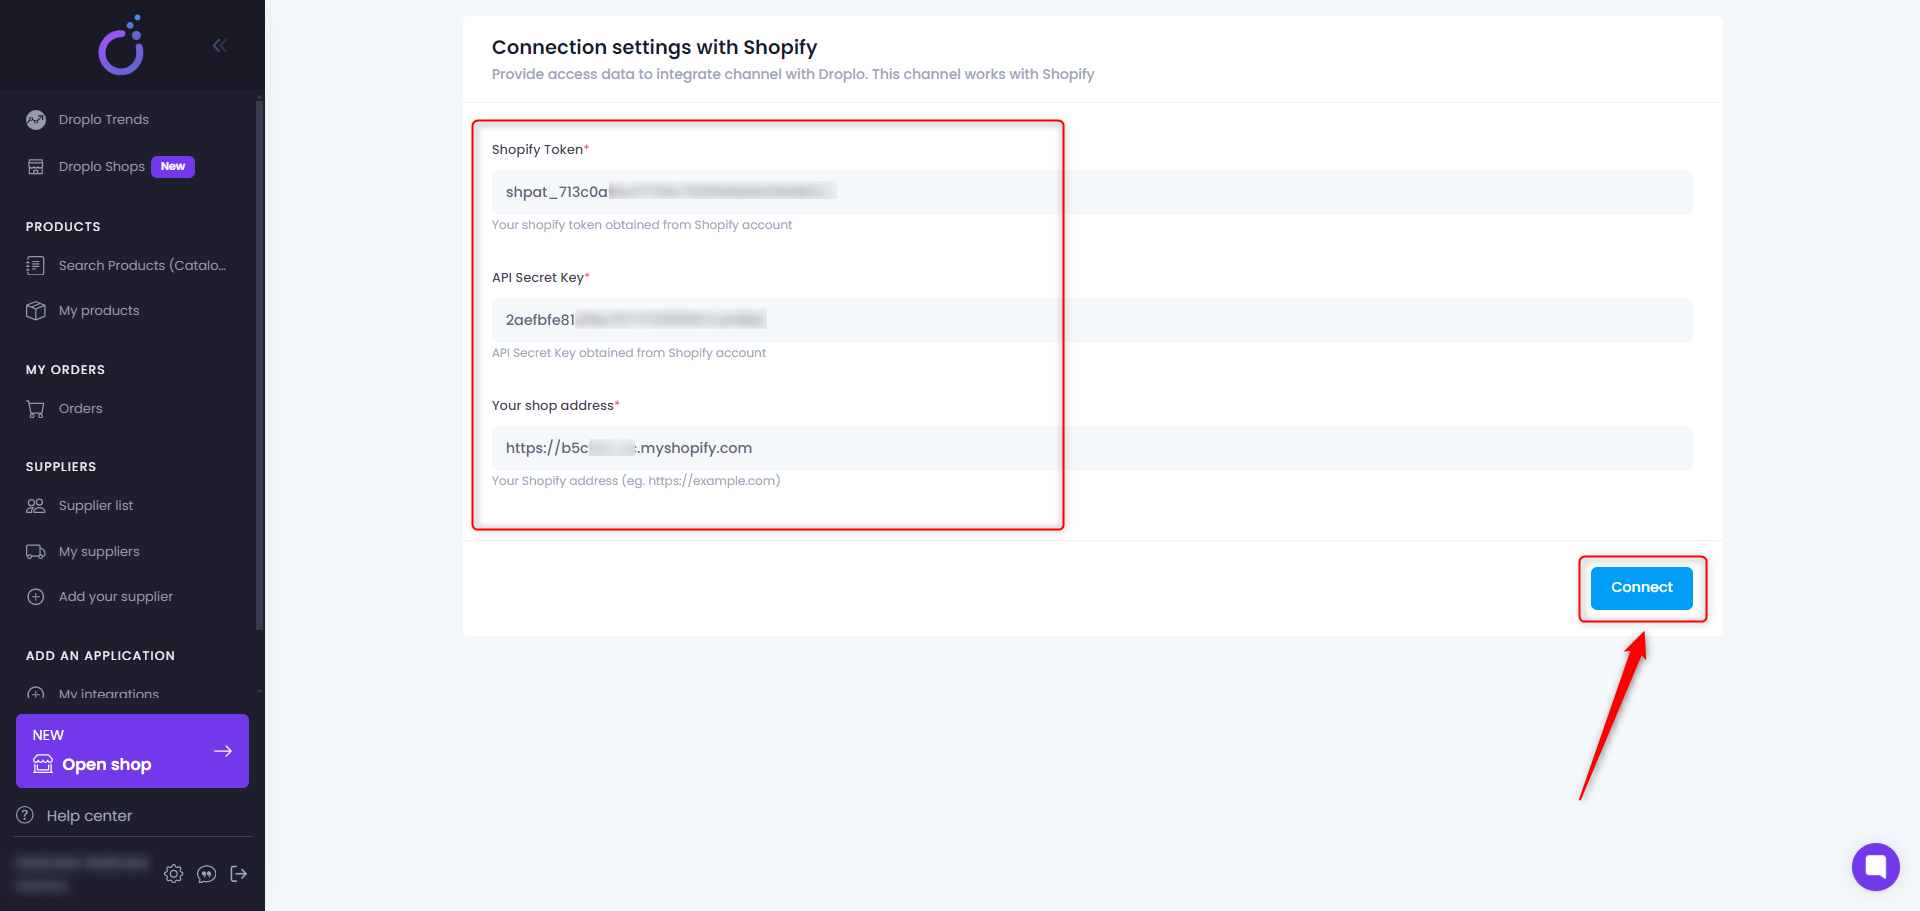
Now using the acquired authorization data from Shopify, you can connect to Droplo.
Note: in the address field, you should use the address of your Shopify subdomain, not the address of your publicly shared store.
This can affect later problems with product synchronization.
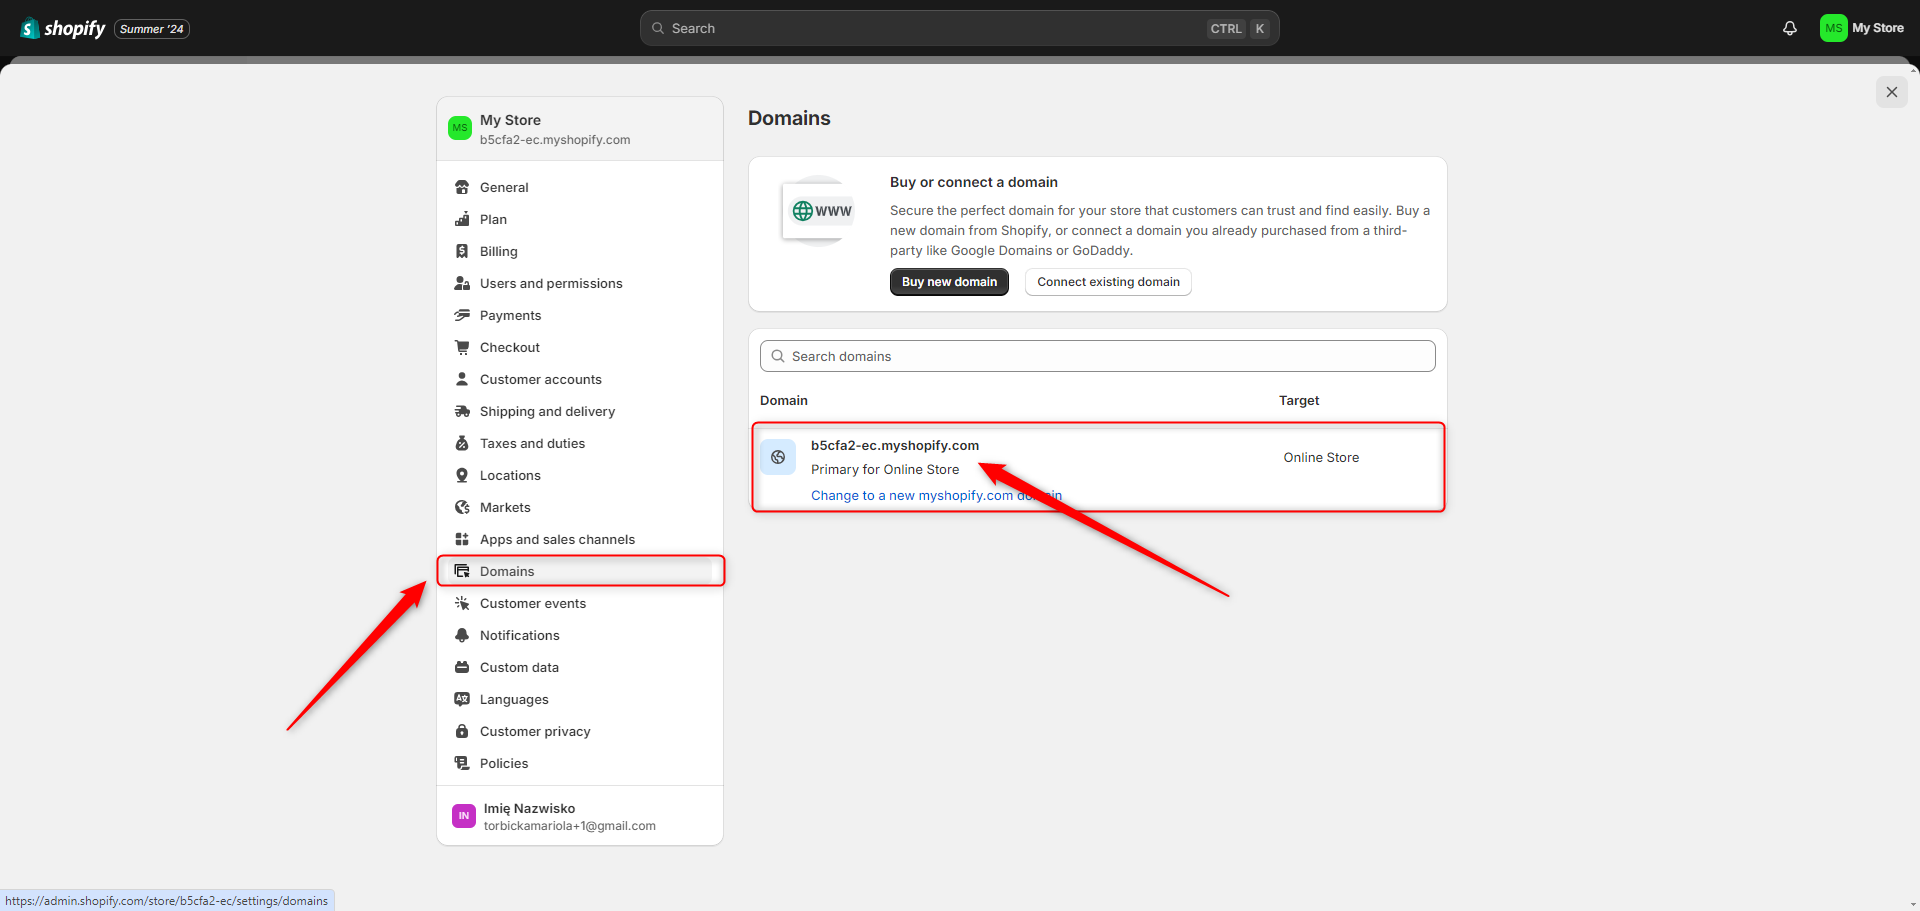
In addition, your domain address should have the prefix “https://”, such as “https://31edab.myshopify.com“.
Return to Droplo. When all fields are filled in, click Connect.
After a successful connection, you will be taken to the Shopify Exporter by Droplo tab.
Remember that you should configure the new connection before taking any other action.
First, set the global price markup and configure the synchronization settings.
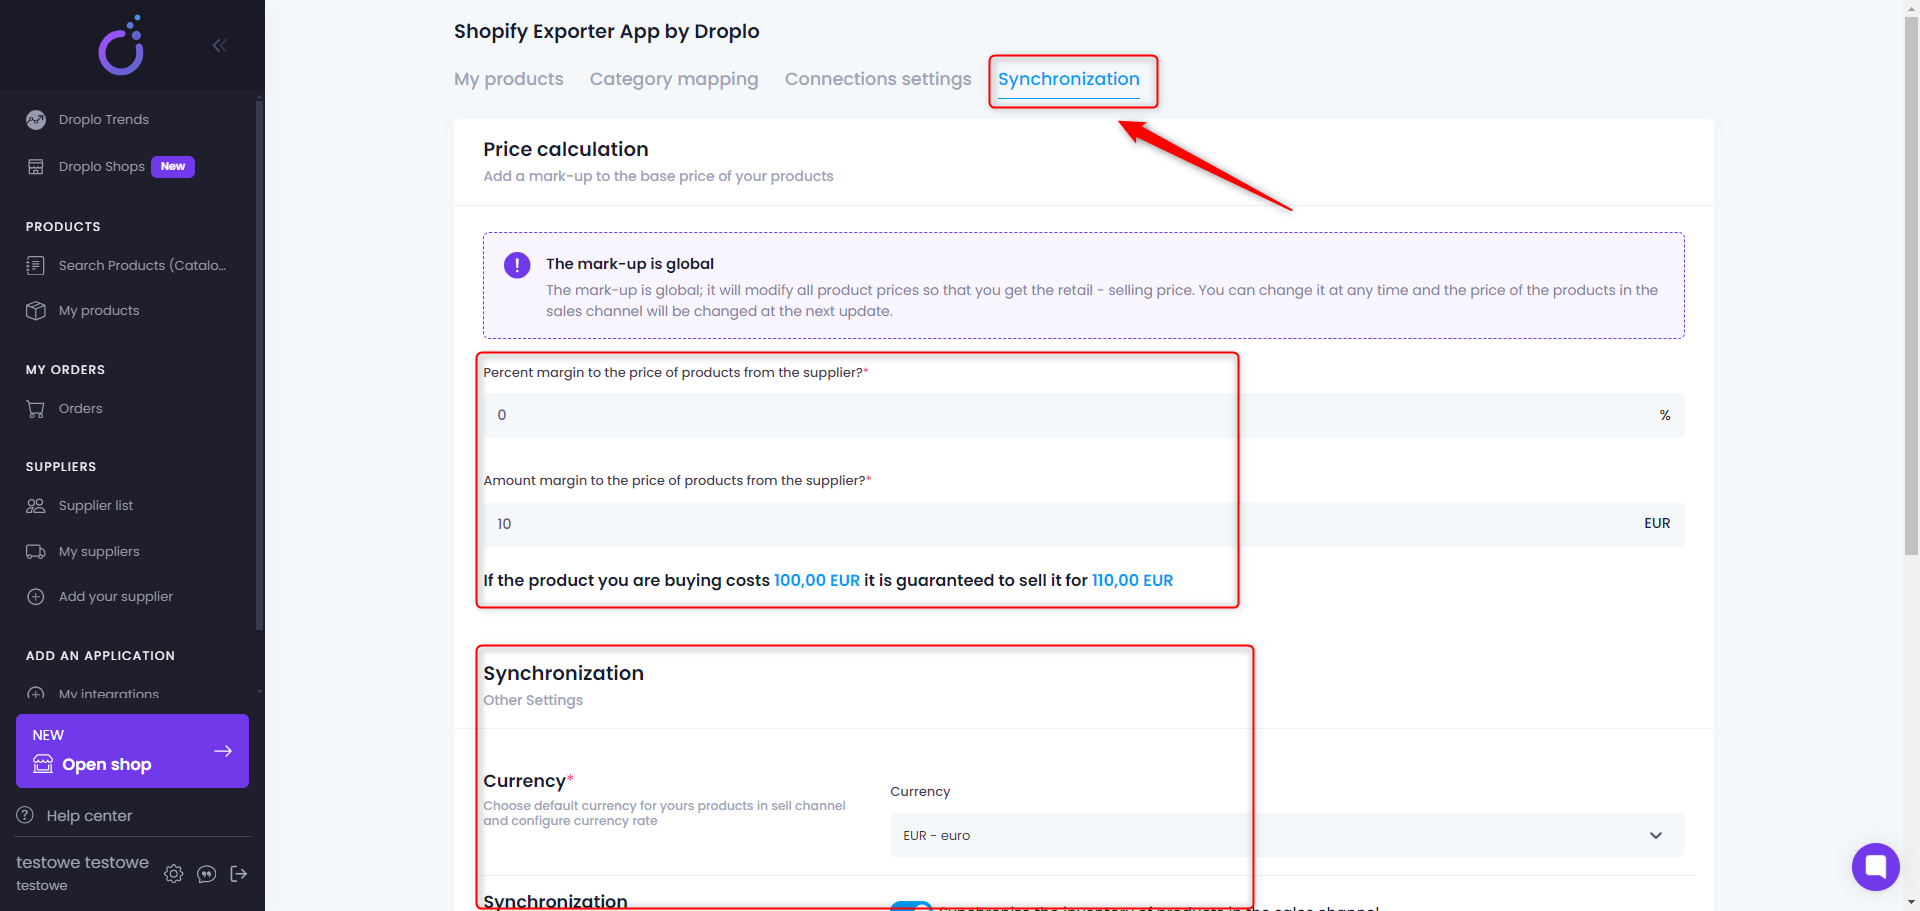
Then click the Save button below the page.
If you’ve already created categories in the Shopify dashboard, you’ll need to map those categories with Droplo before exporting products to the sales channel.
Important! Category mapping will only be available if at least 1 product from any supplier is saved in your list.
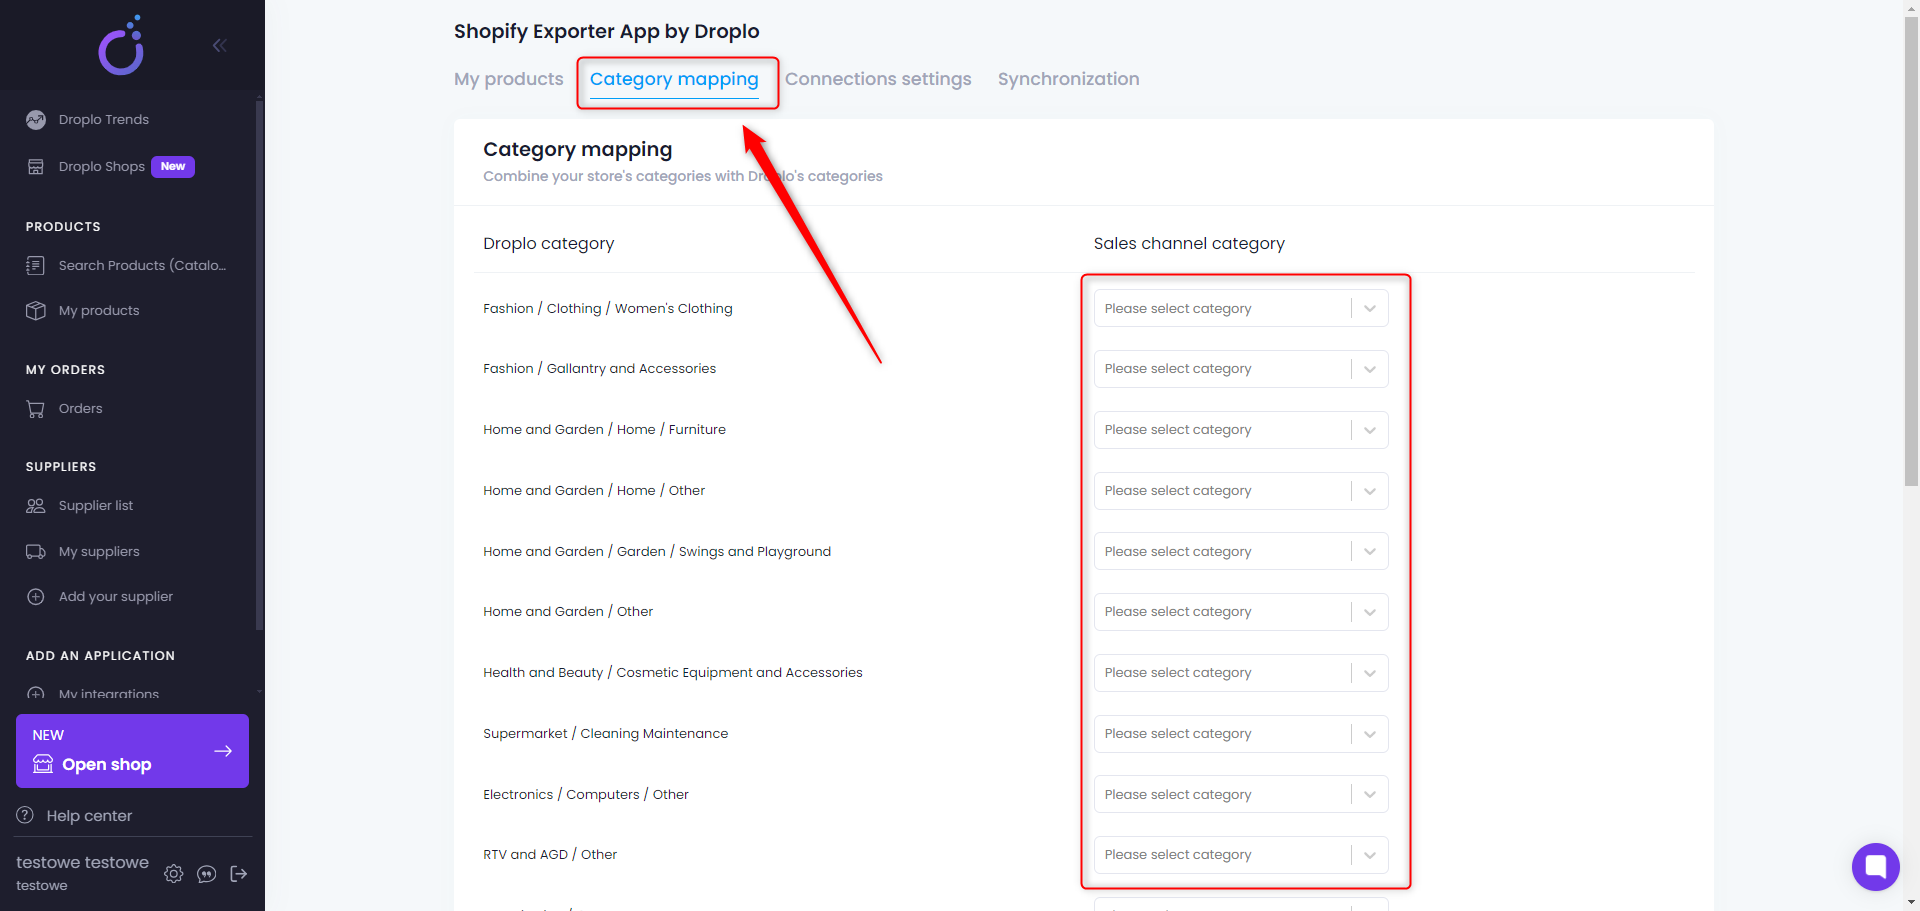
Go to the Category Mapping tab and assign Droplo categories to related versions of categories from your store.
When you have finished assigning each category in the list, use the Save button.
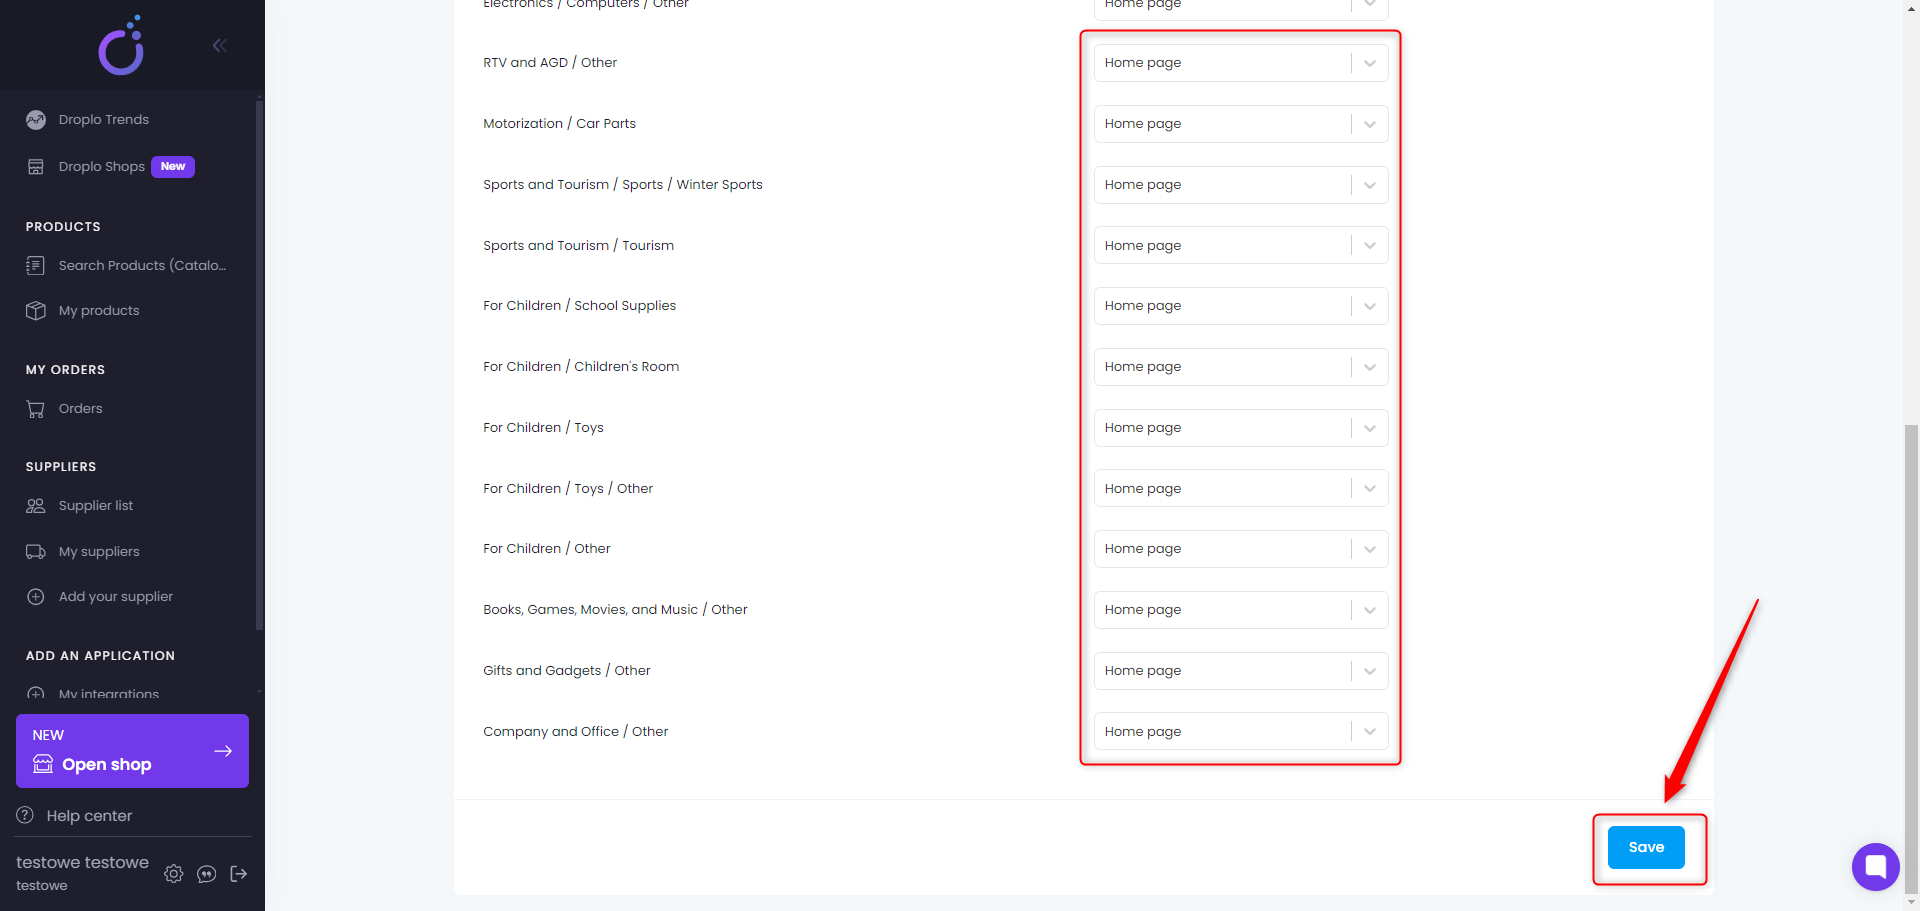
Note: Each time you save more products with different categories in your list, you will need to map them to new categories in the sync settings in order for the products to be uploaded to Shopify.
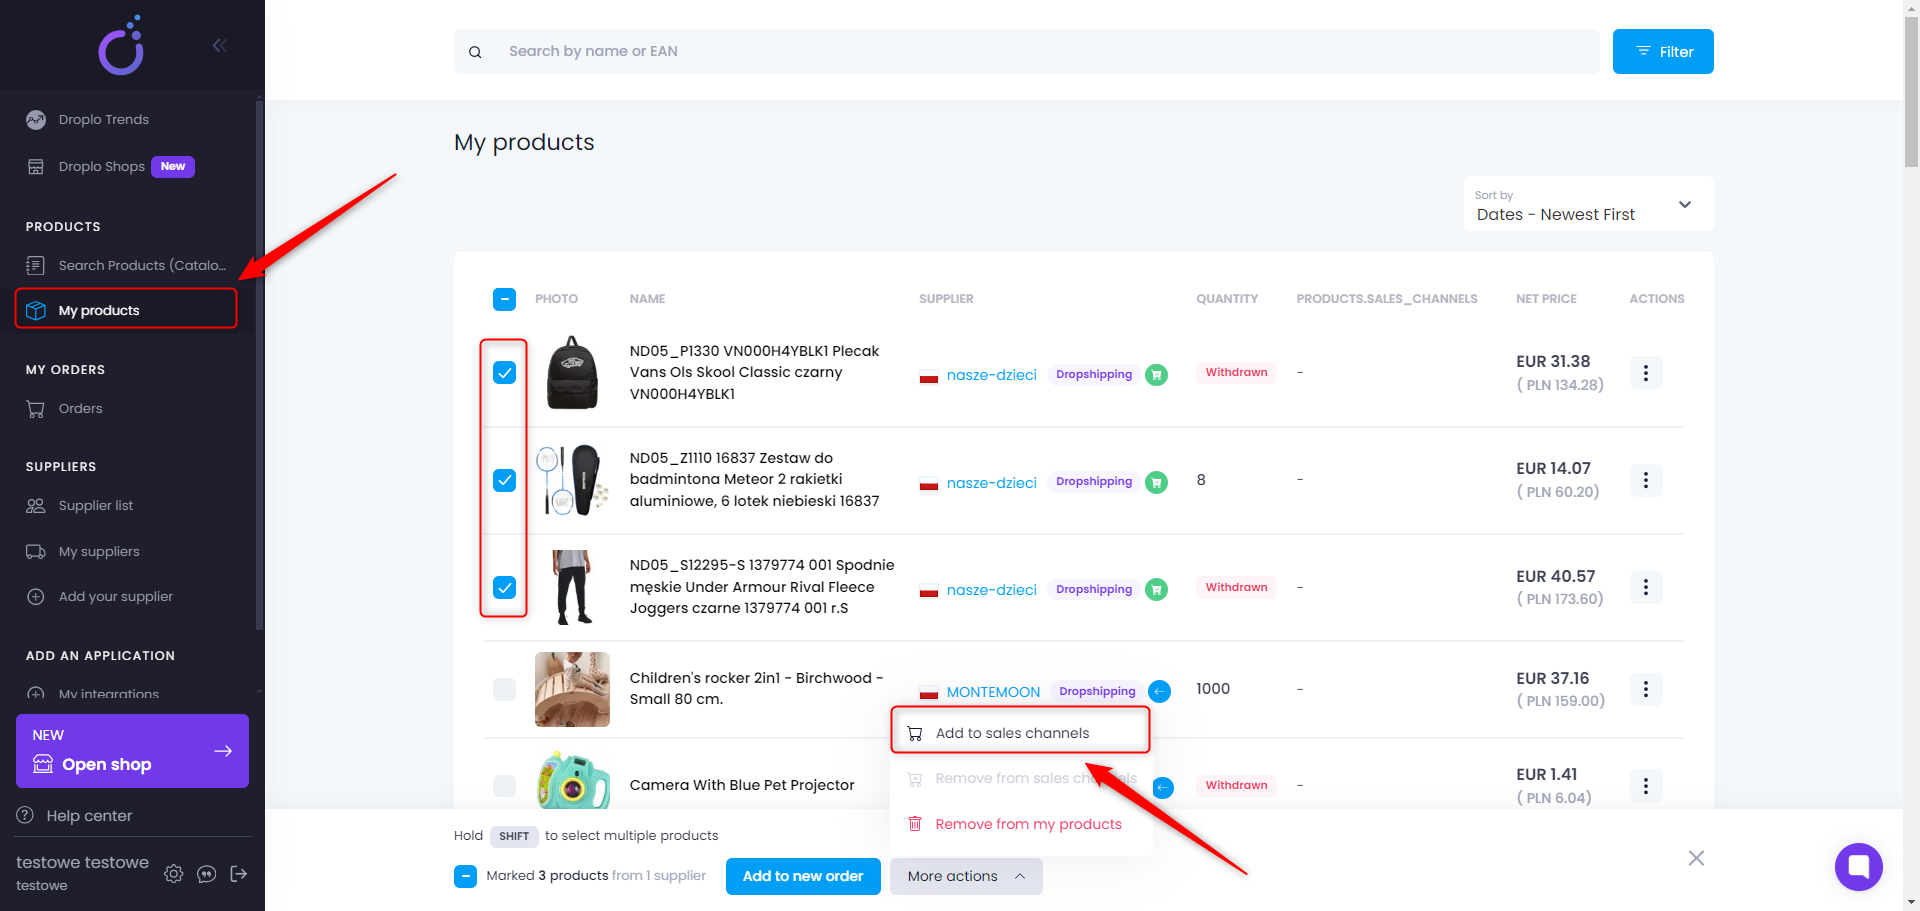
After saving your category mapping settings, you can go to the My Products tab and export the selected products to Shopify via the More Actions -> Add to Sales Channels function.
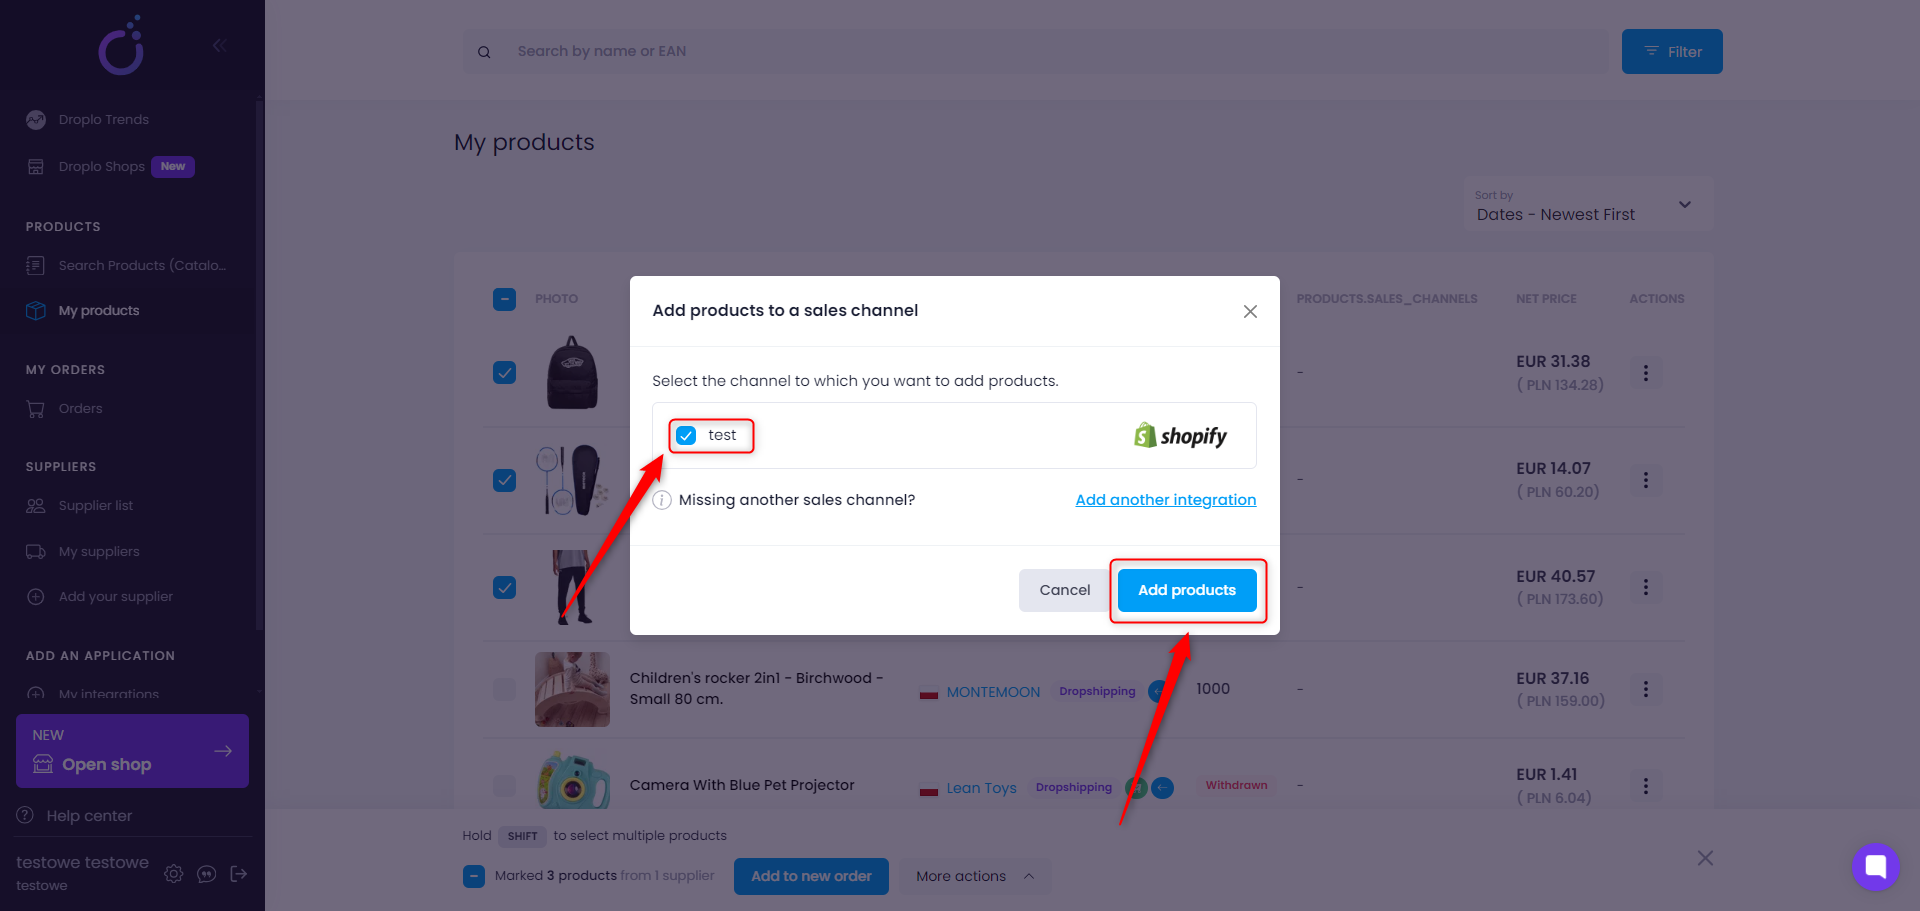
A new window will appear where you can choose which integration you want to upload products to. If the integration has encountered errors, e.g. with the connection, a message will appear at the top of the window.
If this is the case, check again that the configuration has been done correctly on the Droplo side as well as on the Shopify side.
Note: If you want to remove products from Shopify, don’t do it on the side of your sales channel. Remember to always manage your products from within Droplo.
This is because Droplo is the source for updating products in your store. Acting on products outside of Droplo can cause syncing issues.
However, if you don’t want prices or inventory to be updated automatically on the store side, change the sync settings for your Shopify integration.


