Estimated reading time: up to 2 minutes
Connect with WooCommerce
Do you want to connect your WooCommerce store with Droplo? You’re in the right place. Follow this instruction to successfully integrate Droplo and its supplier base with your sales channel.
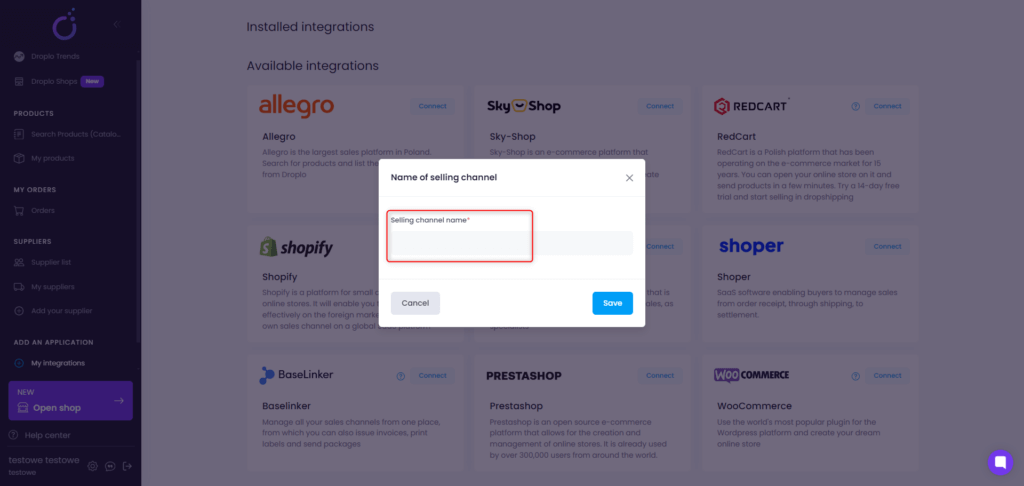
Go to the My integrations window and click Connect in the WooCommerce card.

A new window will be displayed asking you to enter the name of the integration. From now on, the new integration will be named in Droplo as you wished.
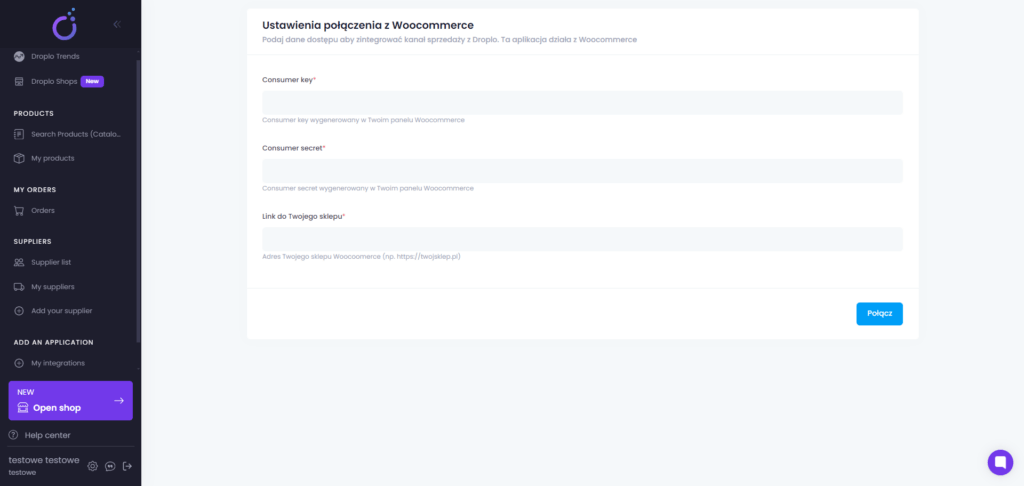
Next, you will be transferred to the connection setting window. In order to pass this step you need to get the authorisation data from your WooCommerce admin panel:
- Consumer key
- Consumer secret
- URL of your store (public domain)
How to obtain the authorisation data? Just follow next steps, we will get you through this 😊
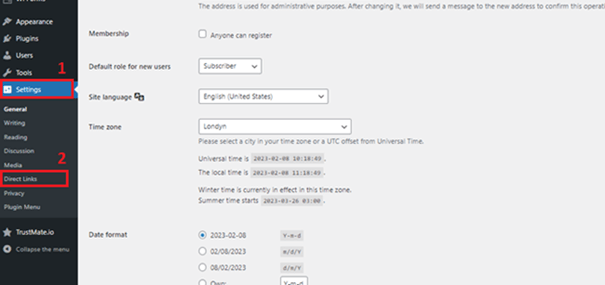
At first, go to your admin panel on WordPress and open main Settings tab (1).
From the settings list, choose Permalinks / Direct Links option (2).
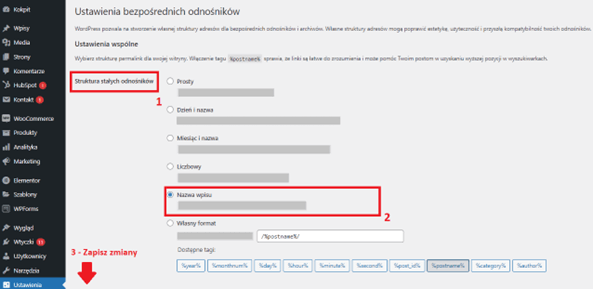
In the newly opened card, check if the Permalink structure (1) is set to “Post name” (2).
If it’s not, mark it and click Save Changes button below the page.
When this step is done, go to the left menu and open WooCommerce tab (1). Then, in the drop-down list, click on Settings tab (2).
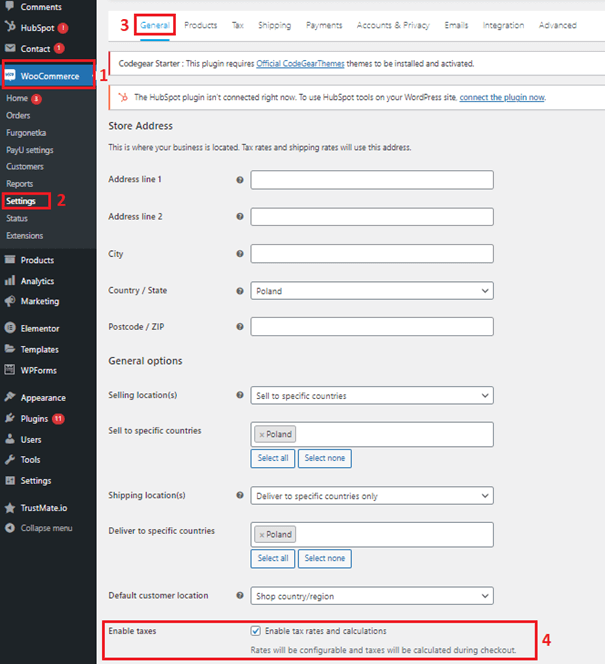
In the General card (3) check the option “Enable tax rates and calculations” (4).
Next go to the Tax card (5) and below in Tax options find the Prices entered with tax. Choose the option “Yes, I will enter process inclusive of tax” (5).
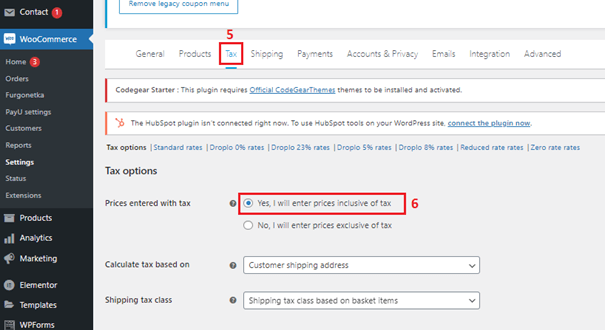
Remember to click on the Save Changes button below each page.
Now you can change the card to Advanced settings (7) and click on REST API card (8).
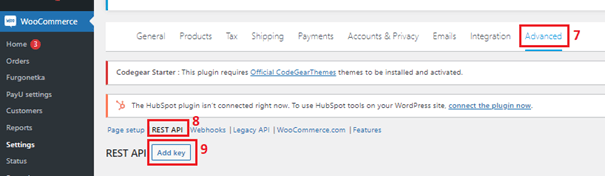
Now click on Add key button (9).
You are now able to insert the Key Details and Generate a new API key. Here you can name your API connection (1), choose the admin account (2) and give it permission: “Edit / Read” (3). When you’re done, click on Generate API key button (4).
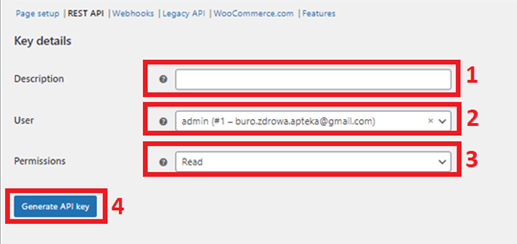
The page will now refresh, presenting you the API keys that can be put into Droplo – WooCommerce connection window.
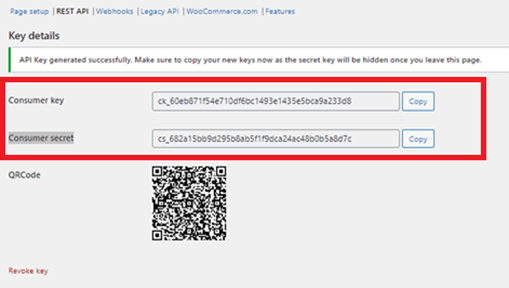
Important! Copy and save your unique Consumer secret key, because you’re able to do this just once.
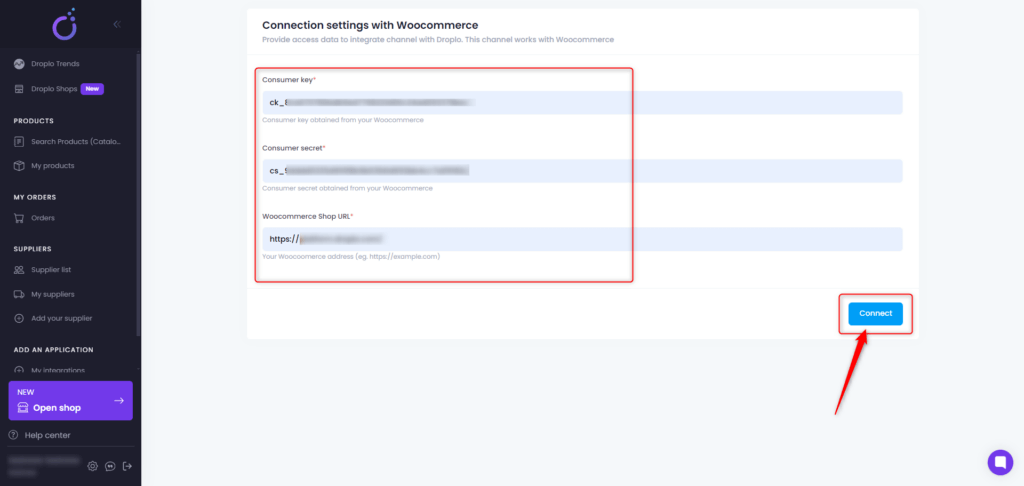
Fill in all the blank spaces with the WooCommerce authorisation data (1) and click on “Connect” button (2). The connection will be fully active in a few seconds.
After successful connection, you will be transferred to the WooCommerce Exporter App by Droplo, where you can
easily configure the integration parameters such as:
- Global price markup (1)
- Price currency (2)
- Price and stock synchronisation (3)
- Export language (4)
- Tax value (5)
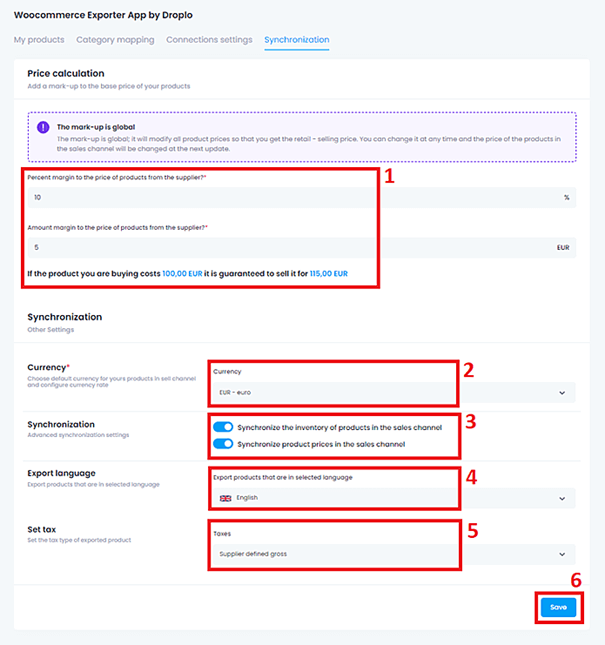
After setting the configuration, click on Save button (6).
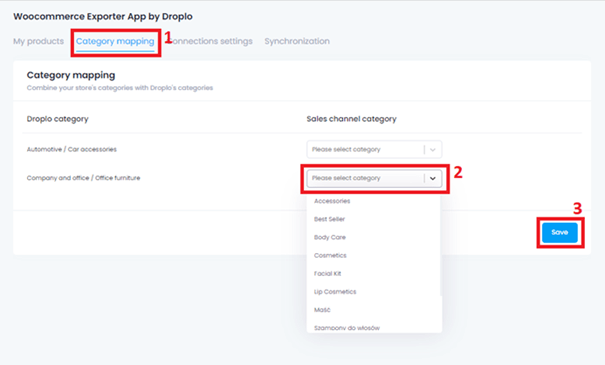
If you already have categories in your WooCommerce store, you need to map those categories with Droplo before exporting the products to your store.
Go to the Category Mapping card (1) and assign the most relative option that fits the categories in.
When you finish assigning every category from the list (2) then click Save (3).
Now you can activate supplier’s offer and save products from the catalogue into “My products” card .
Those products can be then exported to your online store.


